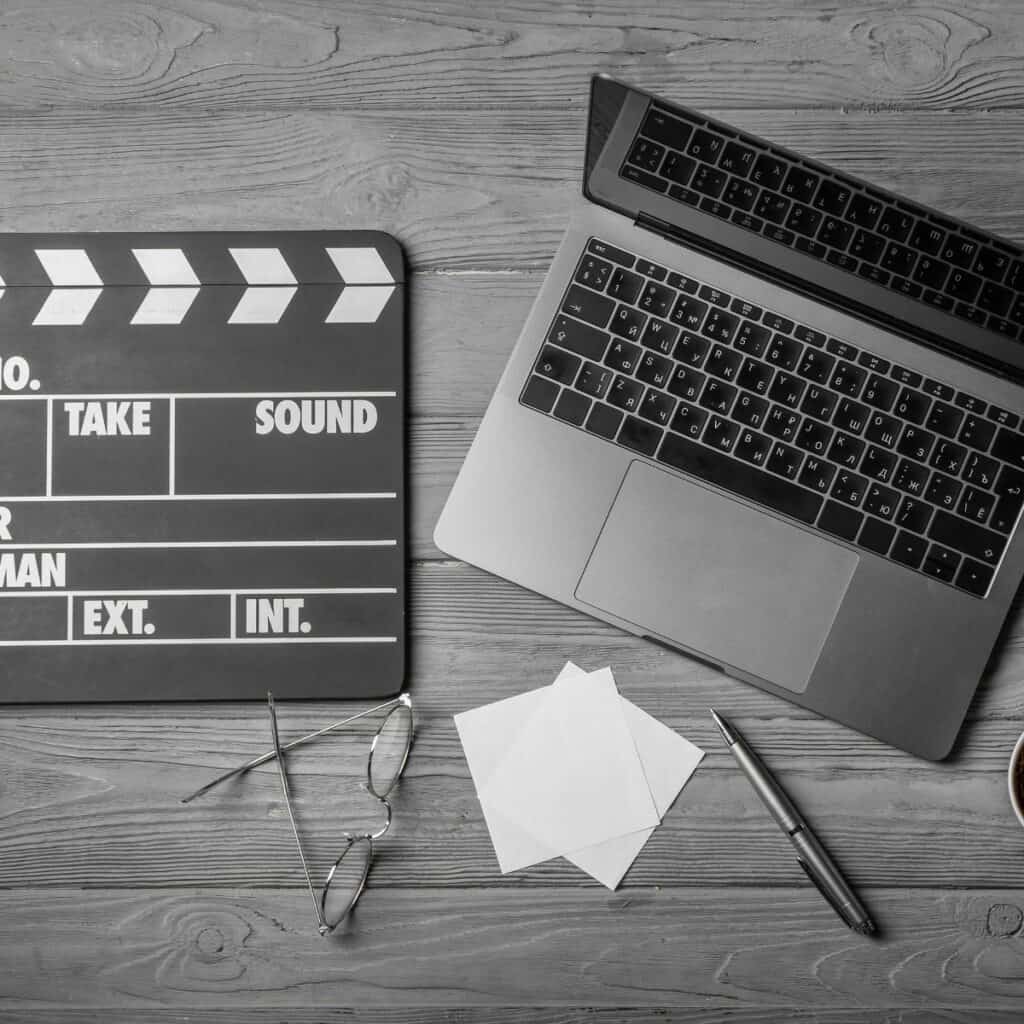
Shot List: What Is It In Video Production?

A shot list is a crucial step in the video production process. It is a planned list of shots that will be used to create the video.
It includes camera angles, transitions, and other details that need to be taken into account to create a cohesive video.
Shot lists provide the blueprint for success, and it is important to understand the basics of what goes into a shot list and how to create one effectively.
In this post we'll cover:
Definition of a Shot List
In video production, a shot list is a detailed document that outlines all of the shots that must be captured during the film or recording session. It serves as a technical guide and reference for both camera operator and director, aiding in planning their work throughout the day or week. A shot list should contain at least 60-80% of the material needed for the final project, allowing for flexibility and improvisation when needed.
A well-crafted shot list can save time and money. By having all of the necessary information at your fingertips – angles, type of shots, mediums used and order of shooting – each scene can be executed quickly and efficiently to ensure all angles are covered while minimizing reshoots. The goal is to ensure that every critical element is captured on timeline so editors have everything they need to put together a stunning production.
As such, an effective shot list should spell out specific objectives and instructions including setup instructions; frame references; size (close up (CU), mid (MS) or wide (WS)); how many takes are required; medium (film, digital video); motion or motionless; desired colors/moods/tone; lens type; precisions on timing/duration of shots; audio elements needed to match with visuals; organization by scenes or categories set forth in edit timeline etc. A cohesive shot list helps make sure no crucial detail is overlooked when crafting an end product.
Benefits of Creating a Shot List
Creating a shot list is one of the most important elements of planning for a successful video production. Although it takes time to create, using a shot list will save time and money in the long run. The many benefits to creating a shot list include:
-It ensures that all necessary footage is captured – A comprehensive shot list will guarantee that any and all important elements are covered. This includes major shots like establishing shots, medium shots, and close ups, as well as details like specific angles or props needed for the scene.
-It provides clarity and purpose – Having an organized master list of all necessary shots makes it easier to plan out the entire day’s shoot. This also helps with scheduling each individual scene more efficiently in order to ensure that nothing is missed or forgotten during production.
-It allows more room for creativity during the shoot – By having pre-determined shots ahead of time, it frees up room on set to allow creativity to flow while still remaining organized. A crew’s energy levels can stay up since they know what needs to be done from start to finish without losing track of ideas mid way through shooting.
Creating a shot list requires some extra effort before production begins but being organized can go a long way towards making sure your video gets done on time and within budget!
Types of Shots
When it comes to video production, a shot list is an important tool. It is used to plan out shots and angles while filming, and helps to make sure that all important elements are covered. A shot list can contain a variety of different types of shots, such as close-up, medium, and wide shots, as well as establishing shots. There are also many more specialized shots, like cutaways, panning shots, and dolly shots that can be included. Let’s take a look at the different types of shots that can be used when creating a shot list.
Establishing Shots
Establishing shots are shots that illustrate the overall scene and set up the context for the story. This type of shot typically presents a wide view of the scene so that we can understand where we are in relation to other elements of the story. Establishing shots can take several forms, such as long takes, panning shots, tracking shots, aerial shots or tilt-shift photography.
In a narrative film or video production, establishing shots help to orientate viewers and give them some context on how characters fit into their environment. An establishing shot should express both the location (where) and state (how) of your story in one single shot — it should also clearly introduce any relevant characters. Done correctly, it quickly sets up all crucial elements needed immediately to understand what’s going on in a scene and creates an imaginary world for viewers before moving on to close-ups or dialogue scenes.
These types of shots are useful for transitions between scenes as well — from interiors to exteriors, from different locations etc — since they quickly provide viewers with information about their location and often suggest temporal relationships between scenes by establishing day or night time suddenly. Establishing shots are also broadly used in nature documentaries where several different geographical locations may be connected with a common theme throughout an episode or series.
Close-Ups
Close-ups are a staple in video production and the most common type of shot filmmakers use to capture the important and intimate details of an area or subject. A close-up usually refers to a shot that emphasizes a person’s face, but is also used to highlight an object or product. They come in a variety of sizes since the exact frame depends on how closely the camera lens is zoomed into the subject.
The available sizes for close-up shots include:
-Extreme Close Up (ECU) – this is shot from a very close distance, often zooming in to capture detail as small as individual eyelashes.
-Medium Close Up (MCU) – this captures part of a person or object with more inclusion of surroundings than an ECU. This is handy when you are shooting dialogue scenes
-Full Close Up (FCU) – this shot includes only part of the body, such as just someone’s face or hands, emphasizing them over their environment.
Cutaways
Video editors often use cutaways to save a scene that was not well shot or to add clarity to the story. This type of shot provides a way to transition between scenes, create an emphasis and avoid audio and visual problems.
Cutaways can be used to give meaning or context to scenes by cutting away from the main action of a scene and later coming back. These shots are usually short insert shots of reactions, details, locations or action that can be used as transitions or for emphasis when needed. The footage for cutaways should help explain what is going on in the scene but should also be interesting enough that it doesn’t seem out of place in the edit.
A few examples of effective use of cutaways include: revealing an object associated with a character (ex: showing a picture from their past), showing an item briefly before its importance is revealed (ex: hinting at hidden violence) and providing visual continuity during a dialogue-heavy scene (ex: giving purposeful reactions). Cutaways can also be used to inject humor into a scene, add impact/tension, establish time/location and provide backstory.
Common types of Cutaways are detailed below:
-Reaction Shot – A close-up shot that captures someone’s reaction to something else happening onscreen.
-Location Shot – Shows where the action is taking place; this could include exterior shots like cityscapes or interiors like offices and homes.
-Object Shot – Takes viewers into close-up detail involving items part of the plot and important characters’ possessions such as jewelry, books, weapons etc.
– Montage Shot – A series of individual shots taken from different angles at different locations which are then edited together for an overall visual effect that may not follow chronological order in the current scene but still effectively conveys how things progressed over time (see example here.)
Point of View Shots
Point of view shots provide the audience with a first-hand look of what a character is seeing and feeling in their environment. In film and television, they can be filmed in a wide variety of ways including hand held, dolly shots, Steadicam or by attaching the camera to a helmet or vehicle. Point of view shots are an effective way to give the audience insight into what is taking place inside the mind and thoughts of our protagonist. Common types of point of view shots include eye lines, extreme close-ups (ECUs), zoom lenses and low angles.
Eye lines provide visual clues for the audience on who is looking at each other in any given shot. This type of shot requires two characters on screen who are both looking at each other in order to create depth within the scene.
Extreme close-ups (ECUs) offer an intense focus on important physical features within a scene like an actor’s eyes or hands. They are used to highlight crucial moments such as when a character is trying to lie or hide something from another person.
A zoom lens is also often used during point of view shots as it can create subtle changes in focus and scale without disturbing the camera’s position or direction. This gives viewers time to notice details within scenes while still conveying emotional intensity without taking away from it through sudden movements. Finally, low angles are often used during point of view shots because they imply power and authority over the space around them; just like when someone stands above us, so too does shooting from a lower angle create this same sensation for viewers that allows them to better connect with our protagonist’s journey through their environment.
Getting started with your own stop motion storyboards
Subscribe to our newsletter and get your free download with three storyboards. Get started with bringing your stories alive!
We'll only use your email address for our newsletter and respect your privacy
Reaction Shots
Reaction shots are used to capture a viewer’s reactions to a certain action or events. For example, when a character receives news of his friend’s death, the follow up shot is usually that of the character reacting with grief and sorrow. Reaction shots can also be used to show changing tides in terms of feelings and emotions. In other words, they can be as subtle as showing relief after hearing good news or apprehension before taking on something big.
Reaction shots are important storytelling tools that offer viewers a glimpse into the internal emotions of characters in the scenes. For example, when two people are having an argument in close-ups, reaction shots give audience members context for each person’s underlying motives or feelings in addition to the dialogue they exchange. Reaction shots can also be used to add tension and suspense when revealing information or developing plot points. Whether it’s surprise, joy, dread or sadness that an audience member should feel during certain scenes, reaction shots can give them full immersion into your story and experience cinematic emotion within your production.
Over the Shoulder Shots
Over the shoulder (OTS) shots are a common way of framing motion picture and television interviews. These shots are usually filmed from behind and slightly above the subject’s shoulder. They provide visual cues to the viewer about who is speaking, as the subject’s entire face will not be in the frame. OTS shots also provide a sense of location and let viewers know where conversations are taking place; when used with multiple participants, it helps to establish whose point of view is being presented.
When setting up an over the shoulder shot, it is important to consider both camera height and angle. The camera should be placed higher than the top of the head while also best capturing all details in the frame, like facial features, action and dialogue. The angle of the shot should not cut off any portions of either participant’s body or clothing; it should also establish a clear connection between primary subjects and remove visual distractions from background elements. Generally speaking, an over the shoulder shot will include approximately one-third subject on one side of the frame (their face) with two-thirds background or secondary subjects on the other side — keeping both sides balanced for storytelling purposes.
Shot List Components
A shot list is a valuable tool for video production projects as it provides a plan of what shots you want to capture to tell the story. It is a comprehensive document that outlines all the shots you will need to make a particular video. Shot lists typically include information such as the shot number, a description of the shot, the length of the shot, and the type of shot. Let’s dive deeper into what specific components are included in a shot list.
Scene Number
A Scene Number is the number associated with a specific scene. This is generally included on a shot list to make it easier for the crew to organize footage shots and ensure that everyone remembers which scene each video clip belongs to. It’s also used for continuity when filming different takes; this number helps to quickly identify them and keep them organized. For example, if you have four takes of the same scene with slightly different compositions or angles, you would have four scenes labeled one through four. This makes it easier for editors and directors when looking at footage to know what was shooting at a given time. A shot list typically follows the format: Scene # _Location_ _Item_ _Shot Description_.
Description
A shot list is a detailed plan that serves as a reference guide while filming. It documents shots—wide, close-up, over the shoulder, dolly, etc.—and can also track angles, lenses, coverage, camera and any other special setup that needs to take place in prep for filming. Logistically speaking it’s an incredibly handy tool and is an essential part of most video production processes.
A shot list should include all components necessary to documment a successful shoot. Generally this will include:
-Location – Where the shot is being taken
-Shot type – Whether wide angle, closeup etc
-Shot description – A written description of the background of the scene
-Action & dialog – What dialogue will be spoken and action taken in the frame
-Camera setup – Angles and lenses used for the shot
-Coverage & takes – Number of takes for coverage and other specific instructions for actors or crew for a particular shot
Camera Angle
The camera angle is a fundamental component of any shot list. It should be specified as though you’re describing the location of the camera to someone who cannot see it. Generally, camera angles are broken down into two categories—wide angle and close-up—each with wide varieties of different concepts and settings.
Wide angle shots typically involve more space within the shot, while close-ups get the subject closer to the lens so that only their face or hands appear in the frame. Common names for each include:
Wide Angle Shots:
-Establishing Shot: a wide shot depicting the general location or area where a scene is set, used mostly in dramas and comedies for clarity
-Full Shot/Long Shot/Wide Shot: features a full body of an actor from head to toe from some distance away
-Medium Wide Shot (MWS): wider than a full shot, takes into account more of surroundings
-Midshot (MS): often used as an inbetween shot, offers an adequate representation of character and environment while allowing filmmakers to adjust focus easily
-Two-Shot (2S): two characters in one frame together occupying majority of space in most cases
Close Up Shots:
-Medium Close Up (MCU): focuses on subject’s upper body or shoulders up such as for dialogue scenes
-Close Up (CU): close enough that audiences can register facial features but not expressions from further back than midshot
-Extreme Close Up (ECU): fills entire Frame with part of subject’s face such as eyes or mouth
Each camera angle provides different insight into individual characters and even details about their personalities which help create tension and emotion. It’s important to consider how each particular choice affects viewers’ understanding so that your choices match what best serves your story.
Lens
The lens that you choose will affect many of the technical aspects of your shot list. Wide-angle lenses capture more and are great for establishing shots and capturing large areas without needing to move the camera. Medium and normal lenses can provide a deeper, more detailed level of focus for scenes that require extra detail or when you need to create a sense of depth in the shot. Longer Telephoto lenses are useful for getting up close shots from a distance, such as nature photography. They also provide narrowing and compression which can be used to give the scene more depth, separation and background compression than what could be achieved with a wide lens. Zooming in with either manual or motorized zoom lenses, while filming, also creates a sense of urgency or agony which cannot be duplicated through any other type of lens technique.
Duration
When making a shot list, you will typically specify the duration of the shot. A good rule of thumb is that if a shot will be used to convey information or emotion, it should last for 3-7 seconds. This length can vary greatly depending on the purpose and content of the scene, but considering this as your baseline for composition can help you select what shots are necessary and how to most effectively build them from one another. Breaking up shots into smaller units and slipping them in-between your key shots can also be used to add tension or provide narration within a scene.
Each shot should also be given an overall sense for its duration — whether that’s a very few seconds (for transitions), up to more extended ‘over the shoulder’ shots that could go on longer than 10 seconds or even minutes (for dialogue). Think long term when designing your storyboard so that any individual part doesn’t become too monotonous if stretched over several minutes.
Audio
When creating a production shot list, audio elements need to be taken into consideration. Audio components can include voiceovers, foley, sound effects, and background music. The production crew should take note of any content that requires audio synchronization such as lip-syncing or sound effects that match visual cues.
Ensure the shot list indicates all necessary audio requirements like the music to cue a scene or the sound of cars passing in the background. Additionally, the environment chosen for recording should have minimal interruption from outside noise so that audio captured on set is suitable for editing in post-production. The production team should also plan their camera setup rather than relying on post-production techniques to capture sound.
Having a plan and taking time to think through things such as microphone placement, actors speaking volume and other factors will make sure all audio needs are met during filming and prevent disruptions because mistakes weren’t caught early enough in pre-production.
Tips for Creating a Shot List
A shot list is an essential tool for any video production project. It allows you to plan out your shots ahead of time and ensure that all necessary footage is captured. When creating a shot list there are a few tips you should keep in mind to make sure your list is accurate and comprehensive. Let’s go over some of these tips and how you can use them to create the perfect shot list.
Plan for Coverage
When creating a shot list, it is important to plan for coverage. Consider which camera angles you will need to create an effective story—wide shots for large scenes, medium shots to capture two or three characters in conversation, over-the-shoulder shots that show two people in conversation, or close-ups which will show detail as well as emotions. Also keep in mind that when shooting dialogue sequences you’ll want to try and get at least one take with each camera angle so that you have footage to edit together later on. This technique is called ‘cross-cutting’ and ensures that your video looks professional.
It is also a good idea to think about the types of lenses you may use when planning your shot list. With a longer lens you can capture more intimate moments while using a wide-angle lens will help capture larger scenes with more details such as crowd scenes or outdoor locations. Thinking ahead about these elements during pre-production helps ensure that your video shoot runs smoothly and efficiently once it’s time start rolling the camera!
Brainstorm Ideas
Before you set out to create your shot list, it’s important to brainstorm some ideas and consider how you want to communicate your story visually. Here are a few tips that you can use when brainstorming ideas:
-Start with a basic outline of the video’s story. Brainstorm possible shots that could help communicate the story.
-Take a step back and consider how editing will affect the look and feel of your video. Editing can make all the difference when it comes to conveying the impact of a scene or the underlying emotion of an event.
-Create visuals in advance that will help define each scene. You’ll want to create sketches or diagrams for each shot that you plan on including in your video so that you can save time during production and keep everyone on track.
-Make sure to include camera angles for each shot on your list as well as any special effects or other key details such as lighting, color grading, and sound design.
-Think about ways to incorporate creative camera movement into your shots, like using a drone or gimbal, tracking shots with a dolly setup, and adding quick movements with jibs or sliders.
-Consider how different times of day may affect certain scenes — maybe night footage is needed in order to adequately portray an atmosphere — and make sure you account for those elements in your shot list accordingly.
Use a Template
A shot list is crucial for all video productions, as it outlines all the shots you need to capture in order to complete the video. Creating one from scratch is time-consuming and unnecessary; there are a variety of templates available online that will easily let you customize the list to your specific production.
If you are shooting for broadcast, look for specific broadcast shot lists that allow you to define key elements like camera angles, shot sizes, direction (lateral or docking), resolution, dealies and color grades. Make sure you create a backup copy of the template so you don’t have to start over if something goes wrong.
For more independent shoots like music videos or movie productions, look for comprehensive templates that focus on staging and scene composition. Be sure to add additional columns describing action and character motivation within each scene – these may be short dialogue notes or comic book-style explanations that can be helpful when planning out complex scenes with multiple characters in them. Finally, assigning page numbers in column form makes organization much easier when jumping between takes and scenes during production.
Prioritize Shots
When you’re creating a shot list, it’s important to prioritize your shots according to importance. Start by determining whether the scene you’re shooting is essential to driving the story forward or not. If it is, make sure those shots are in focus and take precedence over ones that can be done away with if required.
Next, consider which angles will be most effective in conveying the story or mood you’re trying to portray with your visuals. Decide on any equipment you may need for special shots and allocate extra time for setting up and preparing each shot before filming begins.
Finally, keep time constraints in mind and plan out how much time it will realistically take to achieve each angle and cover all major compositions without wasting too much time. By planning ahead of time, you’ll minimize distractions on the day of shooting, avoid rushing when trying to produce quality visuals and remain efficient with your crew’s efforts.
Be Flexible
When creating a shot list, it is important to be flexible. Audiences have different preferences and expectations when it comes to video, so it is essential to take into consideration the tastes of the desired demographic.
It is necessary to carefully weigh out all elements of the storyboard and shot list in order to create a versatile product. Instead of being tethered to the plan, filmmakers should look at taking risks and innovating throughout their film’s production process much like an artist in any medium would do. Not sticking too closely to a set plan can encourage filmmakers to draw from experiences or unique perspectives that could have been overlooked or forgotten due to tight deadlines or a pre-set idea.
By remaining flexible, filmmakers can stay creative and potentially surprise the intended audience with well-crafted shots that enhance effects and overall enjoyment of the viewing experience. Keeping an open mind helps every individual involved grow from new perspectives which inevitably leads everyone involved closer toward improved storytelling within their motion pictures – creating tangible outcomes for moviegoers through uncharted creative territories for video production professionals alike.
Conclusion
In conclusion, a shot list is an integral part of video production. It helps to ensure that all of the necessary shots are captured before the filming process officially wraps. The shot list works in tandem with a storyboard and/or script, providing a visual reference as to what shots need to be taken during each take. This visual map helps everyone involved in the project remain focused and stay on track so that the editing process goes smoothly, without any additional footage needed. With multiple camera angles and props included in many videos these days, a shot list can help ensure that everything needed for the final cut is ready for production day.

Hi, I'm Kim, a mom and a stop-motion enthusiast with a background in media creation and web development. I've got a huge passion for drawing and animation, and now I'm diving headfirst into the stop-motion world. With my blog, I'm sharing my learnings with you guys.
