Blue Screen: What Is It And How To Use It In Video Production

Blue Screen, also known as Chromakey, is a special effects technique used in video production to create a composite image by combining two images or videos. It is used to layer a background image behind an actor or object. Using this technique, a subject can be superimposed onto any background, allowing filmmakers to create scenes that would normally be impossible in real life.
Let’s dive into this technique further and explore how it can be used in video production.
In this post we'll cover:
Definition
Blue screen, or Chroma key in technical terms, is a type of special effects in video and TV production that allows producers to superimpose one image over another. This visual effect is often used for scenes with actors interacting with natural or constructed backgrounds that would otherwise be impossible or too costly to film on location. Producers can achieve this effect by shooting the foreground elements in front of an even and bright blue background, then replacing the blue screen with whatever backdrop they choose.
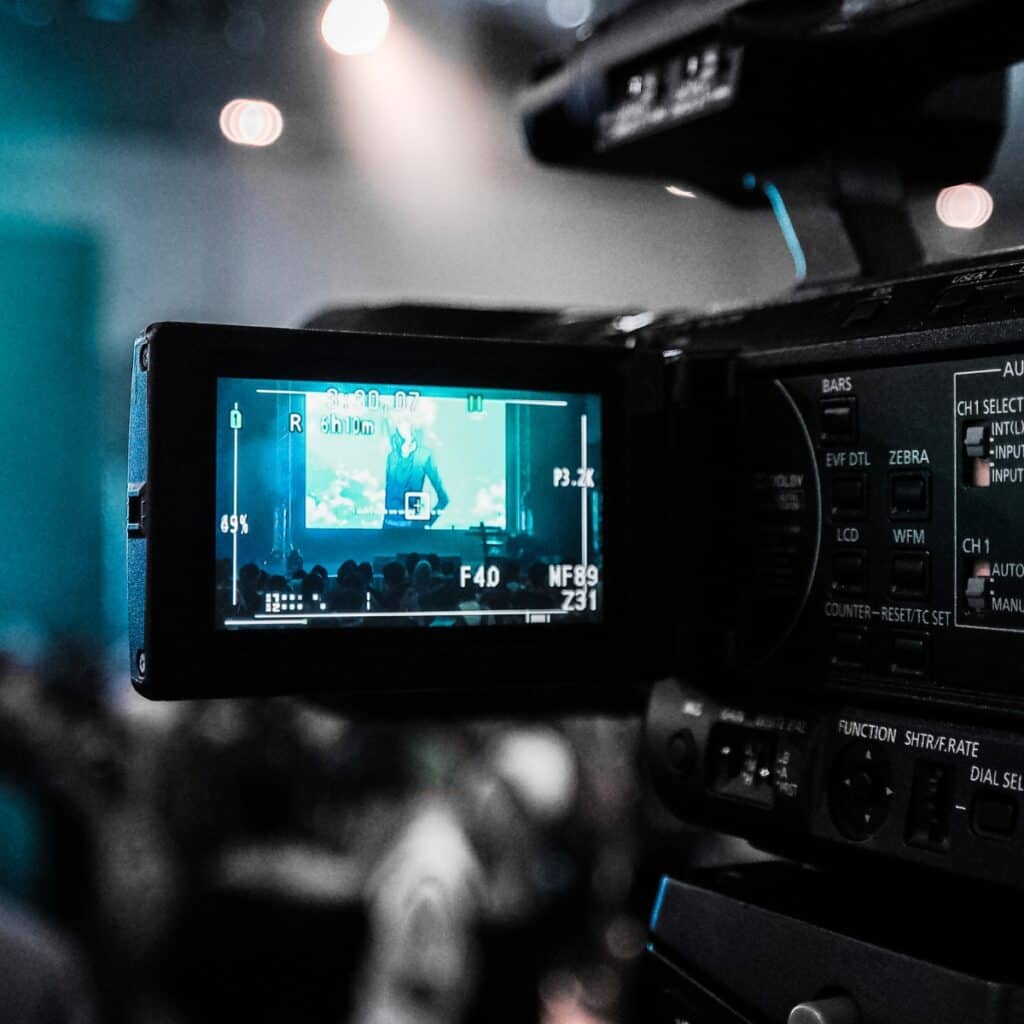
The process of chroma keying begins by setting up a blue screen background – usually utilizing an evenly-lit backdrop of smooth blue fabric – onto which the subject is filmed. During filming, all elements that appear on the video recording must stand out clearly against the blue background. To ensure this contrast is clear on camera, it’s recommended to use multiple light sources that are placed in front of – and behind – the subject being filmed so as not to cast any shadows onto the blue backdrop.
Once filming is completed, producers can use a dedicated chroma key software program to isolate and remove any unwanted pixels from the green-screened footage – replacing them instead with whatever new digital set or background they have chosen for their project. With this technique, it’s possible for filmmakers to produce incredibly convincing special effects sequences without requiring costly locations shoots or large sets.
Types of Blue Screen
Blue screen, also known as chroma key or color keying, is a post-production technique used in video production to composite two images together. A blue (or sometimes green) backdrop is used in the background of one image, and any parts of the backdrop that appear in the image are then replaced with other footage layered over the top. Professional and amateur filmmakers use blue screen to merge videos shot from separate locations into one distinct scene.
The color used for the blue screen matters; this is called chromakey. Different hues create different levels of difficulty when compositing footage. Aside from traditional blue screens, several green screens have become popular as well. Green has traditionally been favored due to its distance from skintones and other common objects that may be mistaken for part of the background; however an ideal color will depend on factors such as lighting, camera direction and more.
The most common types of blue screens include:
- Chromakey Blue Screen A core composed of powder-coated steel rods forms a standardized enclosure painted with theatrical scenic paint that reflects a neutral blue hue under film lights. This type of screen provides consistent chroma key results when working on professional sets because it creates precise lighting conditions.
- Cloth Backdrops Portable cloth backdrops are made in various weight fabrics (usually muslin) and supplied primed for painting, or already pre-painted with various hues including traditional chromakey blues shades like sky or teal blues and greens. These make great portable “on location” backgrounds provided they remain wrinkle free and hung correctly for even tonal coverage.
Benefits of Blue Screen
Blue screen technology is a popular tool used in video production and can offer a range of different benefits. It allows filmmakers to composite multiple shots together and create more complicated scenes, with one location standing in for multiple locations. It can also be used to bring more depth to scenes and helps add a sense of realism to the footage.
Let’s look at the various benefits of using blue screen in video production:
Getting started with your own stop motion storyboards
Subscribe to our newsletter and get your free download with three storyboards. Get started with bringing your stories alive!
We'll only use your email address for our newsletter and respect your privacy
Backgrounds
Blue screen, also known as chroma keying, is an advanced method of combining two images or videos by replacing a color in one image with another. By using a specific shade of blue (or green as an alternative), filmmakers can insert an image into the background of a clip with relative ease. The most common applications of blue screen technology—across both video and still photography—are weather reports, newscasts, and movie special effects. The benefit and flexibility of blue screen technology are nearly endless; any backdrop can be inserted without the need to physically visit or create sets.
The use of a consistent lighting setup is essential when working with a blue or green screen background, so that the colors used in the foreground footage stay consistent throughout the entire production process. Camera angles must also be taken into consideration when selecting a location for your unified background; slight variations in camera positions can cause blurring or edge transparencies due to unwanted shadows and reflections in the shot.
By separating out and isolating an object from its competing backgrounds, you can achieve a greater sense of realism on-set and eliminate potential distractions from your main subject. Blue screen supports all types of video cameras from HD to 8K and allows you to:
- Swap out backgrounds quickly during post production with newly filmed footage;
- Use prerecorded backgrounds created earlier in pre-production.
Special Effects
Using blue screen when creating special effects brings a number of benefits and advantages to the production process. By removing the background of a shot and replacing it with a digital backdrop, you can create realistic special effects that would otherwise be impossible to capture. As one of the primary methods used in visual effects, blue screen systems make the most complex shots seem simple while creating believable visuals with minimal effort.
Blue screen allows you to combine two sources of footage together and add creativity by mixing in real-world elements into a scene or introducing additional characters or props. It also serves as an interesting filmmaking technique by allowing you to change from one shot to another instantly without any breaks in between. In addition, compositing techniques using bluescreen help directors create depth within shots by providing them with the flexibility to layer a variety of objects and use different camera angles.
By taking advantage of technological advancements like green screen technology, filmmakers can take their productions to new heights while also saving on time and money spent on traditional physical sets and locations. Blue screens give filmmakers more freedom when it comes to shooting complicated scenes where actors may have difficulty manipulating their environment, or when additional characters or props need to appear without actually being present in-person on set day.
Lighting
One of the main benefits to using a blue screen for video production is the way in which light is used. When shooting with a blue screen, the main light source is coming from behind the subject. This eliminates shadows and allows for a better representation of detail. The lighting also helps to keep colors vibrant and accurate, as well as create a consistent lighting palette across scenes and shots.
The tool of choice for a set-up such as this is usually an LED panel mounted or standing on sticks or trusses so that it can provide even illumination at whatever level might be needed depending on the scene. By being able to adjust the color temperature through supplementary gels and/or diffusions, it gives filmmakers more control over how each shot looks right on set, as opposed to waiting until post production when adjustments have become much more complicated.
Additionally, due to its nature of being a single-source light setup where you are able to see clearly what you are shooting in real time (unlike green screens where depth perception can become distorted), shooting with blue screens has become increasingly popular with large budget studio productions since its introduction into film sets in 2013.
Setting Up a Blue Screen
Blue screening is a valuable tool for creating a virtual environment in which you can place your subject or object within a video production. With this technique, you can place any type of image or video clip behind the subject, in order to create realistic effects.
Setting up a blue screen can be a challenge, but with the right setup and techniques, you’ll be able to create a professional looking video. Let’s take a look at how to properly set up a blue screen:
Selecting the Right Screen
When it comes to setting up a blue screen for video production, choosing the right type of background is key in order to get a good result. Depending on your budget and needs, you have several options.
One type of background is called a chroma key cloth. This is a custom-made blue or green backdrop that is usually made of velvet or muslin fabric which can be hung on a wall or suspended from above with stands. A chroma key cloth requires no painting, and offers an even coverage for smooth gradation for seamless keying.
Alternatively, many productions opt for painted backgrounds. These are traditionally two flats (sides of framed plywood) mounted against each other with your chosen background painted onto their surface. Whereas these backgrounds can give more control over design elements because you are able to paint certain elements into them, they do require more work in the form of pre-production preparation such as taping off corners and painting the entire surface evenly (preferably with violet dye for green screens and blue dye for blue screens). They also take longer to dry before filming commences!
Another option is medium-sized floorscreens – ready-made sheets of chromakey blue material used as a cube/tent around your talent as they perform against the screen behind them – results vary greatly depending on size and lighting conditions but certainly help when trying to get clean edges on limbs within scene shots quickly!
Finally – some studios offer digital blue/green screens – this involves shooting in front of a large LED wall where any chosen color from green or blue can be projected onto it as required – this is quite often used when working within tight timeframes where painting flats isn’t practical. But keep in mind that due to the reflectiveness of LED walls, there can be extra considerations taken into account such as avoiding reflections – both in talent wardrobe choice & lighting placement strategies!
Whichever option you decide suits you best; ensure that you test it out thoroughly before starting principal photography – ensuring that all unwanted spill has been removed or accounted for accordingly. With careful planning, setting up your own blue screen backdrop doesn’t have to be daunting task!
Lighting the Screen
When using a blue screen for your video production, proper lighting and angling are critical for getting the best results. You’ll want the screen to be evenly lit and free from any wrinkles or creases. This can be done by creating a three-point lighting system.
- To start, place two basic lights on either side of the screen to light both sides evenly.
- The key light should then be placed directly in front of the subject at an angle that creates shadows and highlights their features correctly.
Creating a three-quarter circle around the scene also helps keep reflections out of the picture, which are caused by studio lights that weren’t properly muted back when digital media was still new to videography. When done correctly, this technique will make sure everything closest to camera looks natural while keeping in focus what’s behind it – all while boosting exposure across scenes with minimal effort!
You may also need to adjust existing lamps or change bulbs if they don’t have enough color temperature range to match your blue screen perfectly; this is common when shooting on a green background as yellow tones usually stand out more. Take time to set up lighting carefully with focused aim points as this will prevent any overlighting or uneven edges in your background area!
Choosing the Right Camera
Before you can begin setting up a blue screen to inject digital backgrounds into your video production, it’s important to choose the right camera. Firstly, more expensive cameras tend to offer better dynamic range, which is essential for easily removing the blue background when chroma keying. When comparing various cameras, look for ones with Codecs that provide a good image quality or support ProRes or DNxHD/HR recording formats – as these are well-suited for keying.
When shooting with a DSLR or mirrorless camera, set the camera to “Cinema” Mode and shoot in RAW format if available – as this will give you the most leeway when Chromakeying in post-production. Otherwise, ultraHD 4K resolution offers the best performance since it allows more room for cropping before losing resolution.
For your lens choices you want to look for ones that are able to keep up with changes in lighting conditions but also produce well matched background and foreground exposures. Aperture should be measured at T-Stop (measured F-Stop + light loss from iris mechanism) as exposure settings need to be very precise; otherwise, additional correction will be required in post processing. Make sure you also select a wideangle lens that covers the full image area of your chosen camera; this way you can get the closest shot possible of your subject against the backdrop – thus providing less work for post production keyers and masking solutions.
Editing Blue Screen Footage
Blue screen footage can be a great way to add a background to your video production. It allows you to add in special effects and create scenes that are not possible with traditional methods. Editing blue screen footage can be tricky and time-consuming but with the right techniques, you can create a stunning final product.
Let’s explore how to edit blue screen footage in detail:
Chroma Keying
Chroma keying is a special effects technique for seaming two different video shots together, by replacing a certain color background with a digital background image. When used in video production, this transitioning process is referred to as “blue screen” or “green screen” because the digital background that is replacing the original color backdrop can be any design or image you want. In some cases, the new background can even have movement in it.
The key to blue/green screening lies in the perfect color contrast between what was shot live and what will become the new digital image. So when you begin your chroma key shooting process, try to choose a backdrop of either bright green or bright blue – colors that will give you maximum contrast against skin tones and clothing colors of your talent/subjects on camera while also offering enough limited tonal range so there won’t be weird artifacts created when you do your keying. Avoid shadows on your green screen (natural or artificial) as they can muddy up your ink keyed area and create especially tough-to-clean edges during editing.
To create maximum effect and realism in editing, remember to shoot footage of your actors against an evenly lit green or blue screen which gives them an element of dimensional depth for a realistic cutaway between person(s) or object(s) against differing backgrounds. If everything is properly set up for chroma keying – lighting being one of the most important factors – it should take no more time than necessary to smoothly transition from backdrop to digital realm and back again during post-production editing.
Color Correction
Once the composition has been completed and the scene is ready to be rendered, the next step of the video production process is color correction. During color correction, a video editor takes different elements of an image or sequence and adjusts them in order to match a predetermined style or look. This includes making any necessary adjustments to the hue, saturation, brightness and contrast.
With blue screen footage, however, there’s an extra layer of complexity added to this step as the software must be used to both isolate and remove green screen footage from existing backgrounds and also match it with any pre-allocated background element or image.
The most important element when it comes to color correcting blue screens is making sure that all necessary elements are properly matched with one another. This includes manually adjusting each individual element – whether it’s an actor’s face or clothing – so that it blends in tones with a new background seamlessly. Additionally, there may be certain effects needed depending on how detailed a scene will be such as:
- adding shadows
- reflections for objects interacting with hard surfaces such as floors or walls.
To ensure that your blue screen footage looks realistic both in comparison to existing backgrounds as well as other onscreen elements like actors and props, spend some extra time tweaking each layer until you get each element perfectly balanced with both its environment and its peers.
Adding Special Effects
Adding special effects to your blue screen footage is one of the most exciting and challenging ways to use this technique in video production. Many green and blue screen scenes will require elaborate sets with moving props and multiple lighting setups, for example.
To achieve such complex visual effects may require specialized software like Adobe After Effects or Nuke Studio. In addition to allowing you to create sophisticated visual effects, these programs can also be used for color correction, compositing and other editing operations.
Another key aspect of creating a convincing blue or green screen scene is accurate rotoscoping—the process of creating a matte or an alpha channel around the actor so that they blend into the background imagery seamlessly. This is often a laborious task because it requires tracing every frame of footage manually. Fortunately, some advanced video production software have automatic rotoscoping capabilities which can be used to speed up this process considerably.
To create truly impressive results using blue or green screens, it’s important that you invest enough time in testing your desired shots in different viewing conditions before shooting begins. If you make sure that the desired final look is achieved during pre-production then chances are that post-production will be much smoother and more efficient!
Conclusion
The use of blue screen for video production is a very helpful tool for creating more realistic images and scenes in the video. It allows producers to add special effects and make the video more interesting. The blue screen can create a professional feel to the video while allowing producers to add a unique look to the scene.
With proper use and planning, the blue screen can be a very beneficial tool in the process of video production.
Summary
In conclusion, blue screen or green screen technology has opened the floodgates for video production. The use of a simple background can provide immense flexibility in creating convincing shots and stunning visuals. While using the technology may seem daunting at first, with just a few steps you can create professional-level effects that will bring your projects to life.
It is important to keep in mind that a well-lit environment is key to getting the effect right—otherwise you’ll be seeing more noise than image. Preparation is also key, meaning both physical and mental preparation. Make sure to light up your background evenly and understand when it works best for special effects shots. When properly used, blue screen (or green screen) will bring out the very best of your creativity and make quite a statement in any video production project – no matter if it’s big or small.
Resources
Whether you’re just starting out in video production or you’re a more experienced user, there are plenty of resources to help you learn how to use blue screen properly. Here are some useful books and videos to get started:
- Books:
- Blue Screen Production Techniques by Jonathan Turner
- Blue Screen Lighting for Film and Video by Peter Stewart
- Using Blue Screen and Green Screen Techniques for Video Production by Dang White
- Videos:
- Advanced Blue & Green Screen Tips with Scott Strong (Premiumbeat)
- Removing Unwanted Objects from Blue Screen with Alan Leibovitz (Premiumbeat)
- How To Get The Perfect Blue/Green Screen Results (Rocketstock)
- Tips for Shooting in a Chromakey Setting (Videomaker YouTube Channel).

Hi, I'm Kim, a mom and a stop-motion enthusiast with a background in media creation and web development. I've got a huge passion for drawing and animation, and now I'm diving headfirst into the stop-motion world. With my blog, I'm sharing my learnings with you guys.
