Lighting Setup for Stop Motion: Best Types Explained

Stop motion is a great way to showcase your creativity, but it’s also a lot of hard work. One of the most important aspects of stop motion is the lighting.
The right lighting can make your animation look professional, while the wrong lighting can make it look cheap and amateurish.
So, let’s talk about the right lighting setup for stop motion.
I’ll share some tips and tricks to get you started, and then we’ll look at some of the best examples of stop motion lighting.
In this post we'll cover:
- 1 Why lighting setup is important for stop motion
- 2 Types of lighting setup for stop motion
- 3 Understanding lighting basics
- 4 Tips for stop motion lighting setup
- 5 How do you position the lights for stop motion animation?
- 6 What is the best lighting setup for stop motion?
- 7 How many lights do I need for a stop motion animation setup?
- 8 Conclusion
Why lighting setup is important for stop motion
Lighting setup is crucial for stop motion animation because it helps to create a believable and immersive environment for your characters to exist in.
The way that light interacts with your characters and sets can greatly affect the mood and atmosphere of your scene and can help to convey the emotions and actions of your characters.
For example, if you’re animating a spooky scene, you might use a combination of dim lighting, shadows, and colored gels to create an eerie and foreboding atmosphere.
Alternatively, if you’re animating a happy and lighthearted scene, you might use brighter and warmer lighting to create a more cheerful and optimistic mood.
Lighting can also be used to create depth and dimension in your scene.
Using techniques such as backlighting, rim lighting, and side lighting, you can create a sense of depth and space to make your scene feel more realistic and immersive.
Getting started with your own stop motion storyboards
Subscribe to our newsletter and get your free download with three storyboards. Get started with bringing your stories alive!
We'll only use your email address for our newsletter and respect your privacy
Overall, lighting setup is important for stop motion animation because it can greatly enhance the emotional impact and visual appeal of your scene.
By experimenting with different lighting setups and techniques, you can bring your characters and scenes to life and create a more engaging and dynamic animation.
Types of lighting setup for stop motion
This is the kind of lighting setup that professional animators like to use. It involves having 4 light sources or lamps:
- Back light – this is the light used to illuminate the subject/figurine from behind.
- Background light – this light will illuminate the background of your photo.
- Key light – a key light is the main source of light that illuminates your character/subject and scene.
- Fill light – this light is used to fill shadows and reduce the contrast.
I’ll go over each lighting type in detail and talk about other setups besides the 4 I just talked about.
Back light
In stop motion animation, backlighting can be used to create a sense of depth and dimensionality in the scene, by separating the subject from the background.
It can also be used to create a dramatic effect, by casting strong shadows on the subject or creating a halo effect around the subject.
Back lighting is a type of lighting that is positioned behind and slightly above the subject.
Its purpose is to create separation between the subject and the background, which can help to create a sense of depth and dimension in your scene.
Back lighting can also be used to create a rim of light around the edges of your subject, which can help to define its shape and make it stand out from the background.
Also, back lighting is often used in stop motion animation to create a sense of drama or tension, particularly in horror o suspenseful scenes.
One advantage of backlighting is that it can help to create a more three-dimensional look to the scene, by separating the subject from the background and creating a sense of space.
It can also help to create interesting textures and details on the subject or set, as the shadows cast by the backlight can create contrast and depth.
Background light
Background lighting is a type of lighting that is positioned behind the subject and directed towards the background.
Its purpose is to illuminate the background and create separation between it and the subject.
Background lighting can be used to create a sense of depth and dimension in your scene, particularly if you are using a layered background.
It can also be used to create a particular mood or atmosphere, such as a warm or cool tone.
Background lighting is often used in stop motion animation to create a sense of realism and immersion in the scene.
One advantage of background lighting is that it can help to create a more three-dimensional look to the scene, by illuminating the background and providing a sense of space.
It can also help to create a more visually appealing scene by adding depth and contrast.
However, it is important to use background lighting carefully, as too much intensity or the wrong angle can create distracting hotspots or shadows.
It is best used in combination with other lighting techniques to create a balanced and visually appealing scene.
When setting up background lighting for stop motion animation, it is important to position the light source carefully to avoid casting shadows on the animation or creating hotspots.
Key light
Key light is a type of lighting technique commonly used in photography and filmmaking. It is the main light source in the scene and provides the primary illumination.
This light is typically positioned to one side of the subject or set, creating shadows and highlighting the shape and texture of the subject.
In stop motion animation, key light is especially important as it helps to set the mood and create the atmosphere of the scene.
It can be used to create a variety of effects, from bright and cheerful to dark and moody.
One advantage of key light is that it can be used to highlight certain parts of the subject or set, creating depth and contrast.
It can also be used to create a dramatic effect by casting strong shadows on the subject or set.
However, it is important to use key light carefully, as too much intensity or the wrong angle can create unflattering shadows or hotspots.
It is best used in combination with other lighting techniques to create a balanced and visually appealing scene.
When setting up key lights for stop motion animation, it is important to position the light source carefully to avoid casting shadows on the animation or creating hotspots.
Usually, key lighting is a type of lighting that is positioned at a 45-degree angle to the subject.
Test shots should be taken to ensure that the lighting is set up correctly and adjustments made as necessary to achieve the desired effect.
In summary, the purpose of key lighting is to provide the main source of illumination for the subject and to create shadows that help to define the shape and texture of the subject.
Key lighting can be used to create a particular mood or atmosphere, such as a warm or cool tone.
It is often used in stop motion animation to create a sense of realism and depth in the scene.
Low-key lighting
Low-key lighting is a type of lighting technique commonly used in photography and filmmaking.
It involves using a single key light to create deep shadows and contrast, creating a moody and dramatic effect.
In stop motion animation, low-key lighting can be used to create a sense of tension and drama in the scene.
It can be particularly effective in creating a spooky or eerie atmosphere by casting deep shadows on the subject or set.
One advantage of low-key lighting is that it can create a strong sense of mood and atmosphere in the scene, with the deep shadows and contrast creating a sense of depth and dimensionality.
It can also be used to hide imperfections in the set or subject, creating a more polished and professional look.
However, it is important to use low-key lighting carefully, as too much intensity or the wrong angle can create unflattering shadows or hotspots.
It is best used in combination with other lighting techniques to create a balanced and visually appealing scene.
When setting up low-key lighting for stop motion animation, it is important to position the key light carefully to create the desired effect.
Test shots should be taken to ensure that the lighting is set up correctly and adjustments made as necessary to achieve the desired effect.
High-key lighting
High-key lighting is a type of lighting technique commonly used in photography and filmmaking.
It involves using a bright and even lighting setup with minimal shadows, creating a light and airy atmosphere.
It’s like key lighting but it’s even brighter to really draw attention to the subject.
In stop motion animation, high-key lighting can be used to create a bright and cheerful atmosphere, often used in commercials or children’s programming.
It can also be used to create a sense of optimism or hopefulness, as the bright and even lighting can create a sense of openness and possibility.
One advantage of high-key lighting is that it can create a clean and polished look to the scene, with the even lighting providing a sense of clarity and focus.
It can also be used to highlight details and textures in the subject or set, creating a sense of depth and dimensionality.
However, it is important to use high key lighting carefully, as too much brightness or the wrong angle can create unflattering hotspots or washed-out colors.
It is best used in combination with other lighting techniques to create a balanced and visually appealing scene.
Fill light
Fill lighting is a type of lighting that is positioned on the opposite side of the key light at a 45-degree angle to the subject.
Its purpose is to fill in the shadows created by the key light and to soften the overall lighting effect.
In stop motion animation, fill light can be used to create a more natural and realistic look by reducing the harsh shadows created by the key light.
It can also be used to create a softer and more flattering effect on the subject or set.
Fill lighting can be used to create a more natural and even lighting effect, particularly if you are using a soft light source such as a diffuser or reflector.
Basically, fill light is a type of lighting technique commonly used in photography and filmmaking.
It is used to fill in the shadows created by the key light and provide more even illumination. This helps to create a more balanced and visually appealing scene.
One advantage of fill light is that it can help to create a sense of depth and dimensionality in the scene, by providing more even illumination and reducing the appearance of flatness.
It can also help to create a more natural and realistic look by reducing the harsh shadows created by the key light.
However, it is important to use fill light carefully, as too much fill light can create a flat and uninteresting look to the scene.
It is best used in combination with other lighting techniques to create a balanced and visually appealing scene.
When setting up fill light for stop motion animation, it is important to position the light source carefully to avoid casting shadows on the animation or creating hotspots.
Test shots should be taken to ensure that the lighting is set up correctly and adjustments made as necessary to achieve the desired effect.
Top light
Top lighting isn’t as popular in stop motion as with other types of film or in photography.
Top lighting is a type of lighting technique commonly used in photography and filmmaking.
It involves placing a light source above the subject or scene, casting shadows downwards, and creating a dramatic effect.
In stop motion animation, top lighting can be used to create a moody and dramatic effect by casting shadows on the subject’s face or highlighting certain parts of the scene.
It can also be used to create a sense of depth by casting shadows on the floor or other parts of the set.
One advantage of top lighting is that it can create a strong sense of mood and atmosphere in the scene.
It can also be used to create interesting textures and details on the subject or set, as the shadows cast by the top light can create contrast and depth.
However, it is important to use top lighting carefully, as it can also create unflattering shadows and highlight imperfections.
It is best used in combination with other lighting techniques to create a balanced and visually appealing scene.
When setting up top lighting for stop motion animation, it is important to position the light source carefully to avoid casting shadows on the animation or creating hotspots.
Test shots should be taken to ensure that the lighting is set up correctly and adjustments made as necessary to achieve the desired effect.
Colored light
Colored lighting is a type of lighting technique commonly used in photography and filmmaking.
It involves using colored gels over the lights to create a specific mood or atmosphere in the scene.
In stop motion animation, colored lighting can be used to create a wide range of effects and moods, from warm and inviting to cool and eerie.
For example, a blue gel might be used to create a cold and spooky atmosphere, while a warm orange gel might be used to create a cozy and inviting atmosphere.
One advantage of colored lighting is that it can be used to create a specific mood or atmosphere in the scene, which can enhance the storytelling or emotional impact of the animation.
It can also be used to create interesting textures and details on the subject or set, as the colors can interact with the surfaces and create unique effects.
However, it is important to use colored lighting carefully, as too much intensity or the wrong color can create distracting or unflattering effects.
It is best used in combination with other lighting techniques to create a balanced and visually appealing scene.
When setting up colored lighting for stop motion animation, it is important to choose the right color and intensity for the desired effect.
Understanding lighting basics
Different types of lighting: natural, ambient, artificial
- Natural lighting – This refers to the use of sunlight or any other type of natural light source available on location. It can be a great way to create a realistic look and feel in your animation, but it can also be unpredictable and difficult to control.
- Ambient lighting – This is the existing light in the environment, such as street lamps, room lights, or even the light from a computer monitor. It can be used to create a specific mood or atmosphere in your scene, but it may not always be strong enough to provide the necessary lighting for your animation.
- Artificial lighting – This refers to the use of artificial light sources, such as LED or fluorescent lights, to illuminate your scene. It provides greater control and consistency than natural lighting, making it easier to achieve the desired look and feel for your animation. It can also be adjusted to match the color temperature of your camera, which is important for creating a consistent look in your animation.
Also read: I’ve reviewed the top 7 best cameras for stop motion animation here (from DSLR to compact to GoPro)
Lighting temperature and color temperature
Lighting temperature refers to the color of light, and it’s measured in degrees Kelvin (K).
The temperature of light can have a big impact on the mood and atmosphere of your scene.
For example, warmer colors, such as orange and yellow, can create a cozy and inviting feeling, while cooler colors, such as blue and green, can create a sense of tension or unease.
Color temperature is a measure of the warmth or coolness of a light source, and it’s also measured in degrees Kelvin (K).
A light source with a lower color temperature will appear warmer, while a light source with a higher color temperature will appear cooler.
For example, the warm glow of a candle has a color temperature of around 1500K, while a cool white LED bulb might have a color temperature of around 6000K.
When setting up your lighting for stop motion animation, it’s important to consider the color temperature of your lights and how it will affect the overall look and feel of your animation.
You may want to use warmer lights to create a cozy atmosphere or cooler lights to create a more sterile or clinical feel.
By adjusting the color temperature of your lights, you can create a more nuanced and visually interesting scene.
Direction of light and its impact on the scene
The direction of light is an important factor to consider when setting up your lighting for stop motion animation.
The direction of light can create shadows, highlights, and depth in your scene, which can help to create a more realistic and dynamic look.
Here are a few common lighting directions and their effects:
- Front lighting: This is when the light source is in front of the subject. It can create a flat, two-dimensional look, which may be useful for certain styles of animation, such as cutout animation. However, it can also make your scene look dull and lacking in depth.
- Side lighting: This is when the light source is positioned to the side of the subject. It can create shadows and highlights, which can add depth and texture to your scene. It can also create a sense of drama or tension, depending on the angle of the light.
- Back lighting: This is when the light source is positioned behind the subject. It can create a silhouette effect, which can be useful for creating a dramatic or mysterious look. It can also create a sense of depth and dimensionality, especially when combined with front or side lighting.
When setting up your lighting for stop motion animation, consider the direction of light and how it can be used to create a more dynamic and visually interesting scene.
Experiment with different angles and positions to see what works best for your animation.
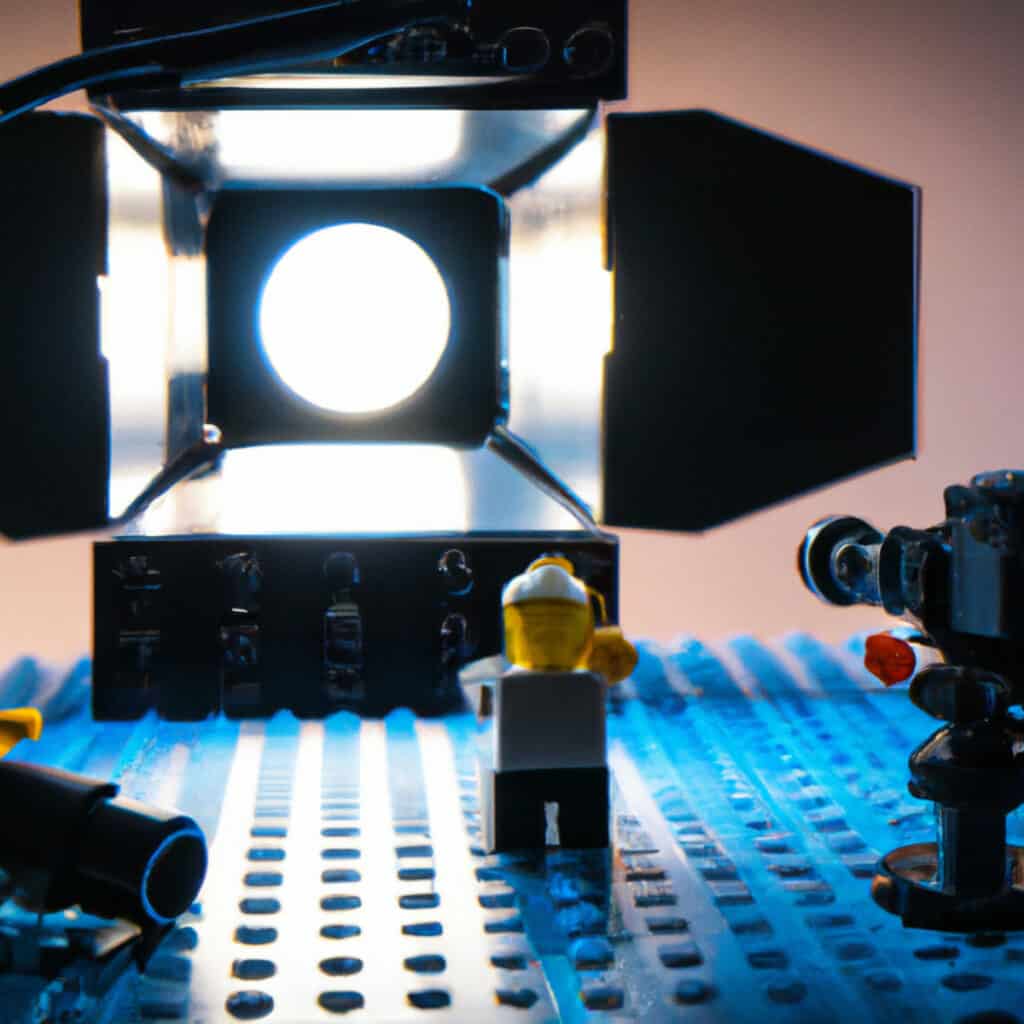
Tips for stop motion lighting setup
When it comes to stop motion animation, lighting is crucial for creating a believable and dynamic environment for your characters to exist in.
Animators will use a combination of floor lamps, table lamps, and LED lights to create a well-lit environment.
Here are some tips for setting up your lighting for stop motion:
- Use consistent lighting: It’s important to maintain consistent lighting throughout your shots to avoid sudden changes in brightness and shadow. This can be achieved by using multiple lights or by using a single light source and positioning it in the same way for each shot.
- Diffuse your lighting: Direct lighting can create harsh shadows and reflections, so it’s best to diffuse your lights with softboxes or diffusers. This will create a more natural and even lighting effect.
- Position your lights strategically: Think about the mood and atmosphere you want to create in your scene and position your lights accordingly. For example, if you want to create a spooky atmosphere, you might use a backlight to cast shadows in front of your characters.
- Use colored gels: Adding colored gels to your lights can create interesting effects and help set the mood of your scene. For example, a blue gel can create a cold and eerie atmosphere, while a red gel can create a warm and dramatic effect.
- Experiment with different lighting setups: Don’t be afraid to try different lighting setups and angles to see what works best for your scene. Play around with the placement and intensity of your lights to create the desired effect.
- Use a softbox: A softbox is a light modifier that attaches to a light source and diffuses the light, creating a soft and even lighting effect. In stop-motion animation, using a softbox can help to create a more natural and realistic lighting effect, particularly for scenes that require a soft and subtle lighting approach.
Remember, lighting is a powerful tool for creating atmosphere, mood, and depth in your stop motion animation.
By experimenting with different lighting setups and techniques, you can bring your characters and scenes to life.
How do you position the lights for stop motion animation?
Alright, listen up, all you aspiring stop motion animators! If you want your creations to look top-notch, you gotta know how to position your lights.
Here’s the deal: you need at least two lamps to light up your scene and avoid pesky shadows. But ideally, you want four lamps to really make your characters pop.
Setting up all four lights (backlight, fill light, key light, and background light) for stop motion animation can be done by following these steps:
- Start with the key light: This is the main light source in the scene and provides the primary illumination. Position it to one side of the set or character and adjust the angle and intensity to create the desired effect.
- Add the fill light: The fill light is used to fill in the shadows created by the key light and provide more even illumination. Position it on the opposite side of the set or character and adjust the intensity to create the desired effect.
- Add the back light: The back light is used to create depth and dimensionality in the scene by separating the subject from the background. Position it behind and above the set or character and adjust the angle and intensity to create the desired effect.
- Add the background light: The background light is used to illuminate the background and create separation between the subject and the background. Position it behind the background and adjust the intensity to create the desired effect.
- Test the lighting: Take test shots to ensure that the lighting is set up correctly and adjust as necessary.
Keep in mind that the positioning and intensity of each light will vary depending on the specific scene and desired effect.
Experimentation and practice are key to finding the best lighting setup for your stop motion animation.
What is the best lighting setup for stop motion?
Stop motion animation is a magical art form that requires a lot of patience and skill. One of the most important aspects of creating a great stop motion animation is lighting.
A well-lit set can make all the difference in the final product. So, what is the best lighting setup for stop motion?
Firstly, it’s important to ensure that the set is evenly lit to avoid any inconsistencies or unwanted shadows.
This can be achieved by using light stands to secure different lights in place. Ideally, you should have at least four light sources: key light, fill light, backlights, and background light.
The key light is the main light source that illuminates the subject, while the fill light is used to reduce shadows and contrast.
Backlights are used to provide definition and subtle highlights, while the background light illuminates the background set.
When it comes to the intensity of the lights, it’s important to use the correct level of brightness to achieve the desired effect.
The key light should be the brightest, while the fill light should be softer.
You can also experiment with using different types of lights, such as point lighting or greaseproof paper, to achieve the right quality of light.
It’s also important to remember that the position of the lights is crucial.
The key light should be placed at a 15-45 degree angle from the subject, while the fill light should be placed opposite the key light to fill in any shadows.
Backlights should be placed behind the subject to provide direct lighting, while the background light should illuminate the background set.
Finally, it’s important to be aware of any potential problems that may arise when filming, such as unexpected shadows caused by the movement of the sun or reflective surfaces.
Using a 4-point lighting system and experimenting with different lighting techniques can help you achieve the perfect lighting setup for your stop motion animation.
How many lights do I need for a stop motion animation setup?
The number of lights needed for a stop motion animation setup can vary depending on a few factors, such as the size of your set, the type of animation you’re doing, and the desired look and feel of your scene.
As a general rule, you will need at least three lights for a basic three-point lighting setup: a key light, a fill light, and a backlight.
The key light is the main light source that illuminates your subject, while the fill light helps to fill in any shadows and create a more balanced look.
The backlight is positioned behind the subject to create depth and separation from the background.
However, you may need more lights or different types of lights depending on your specific needs.
For example, if you’re doing a low-key scene with lots of shadows, you may want to add additional lights to create more contrast and depth.
If you’re using a large set, you may need more lights to ensure that everything is well-lit.
Ultimately, the number of lights you need will depend on your specific requirements and the look and feel you’re trying to achieve.
It’s a good idea to experiment with different lighting setups and adjust the number and position of lights as needed until you achieve the desired look.
Beginners can even just use two lights, but the quality of the animation might not be up to par with high-end 3 or 4-point lighting setups.
Conclusion
So, there you have it – the tips and tricks to lighting a stop motion set so you can get the most out of your animation.
It’s important to remember to use artificial light whenever possible and to use a combination of floor lamps, table lamps, and led lights to create a lit environment.
Stop motion is all about practice, so don’t be afraid to experiment and find what works best for you.
Also read: How to Prevent Light Flicker in Stop Motion | Troubleshooting

Hi, I'm Kim, a mom and a stop-motion enthusiast with a background in media creation and web development. I've got a huge passion for drawing and animation, and now I'm diving headfirst into the stop-motion world. With my blog, I'm sharing my learnings with you guys.

