Green Screen: What Is It And When To Use It?

The green screen is a popular technique used in photography and filmmaking to create special effects. By using a green screen, you can create realistic backgrounds and composite elements from different sources. This technique is typically used for creating backgrounds, overlaying graphics, and creating a virtual environment for your projects.
In this article, we’ll cover everything you need to know about green screen and how to use it for your projects:
In this post we'll cover:
What is green screen?
Green screen is a visual effects (VFX) technique used in filmmaking that allows a filmmaker to replace the background of a video with any other image or video.
In green screen photography and filmmaking, the subject is shot in front of a solid-colored background, usually green, but sometimes blue. After shooting, the footage can then be imported into a video editing program like Adobe Premiere. In this program, pixels that are the same color as the background (green or blue) can be automatically removed and replaced with another image or video.
Green screen can make it easier for filmmakers to create certain shots because they will not have to spend time shooting on location. It also makes it possible to layer several images together and even create complex animation sequences with ease using digital compositing techniques. It’s no wonder that green screen has become an essential tool for filmmakers and photographers alike!
How does it work?
Green screen is a special effects technique that involves shooting video in front of a brightly-lit green or blue background which can then be replaced with a digital background. This technique has been used for decades in filmmaking, television production and videography, and is now becoming increasingly popular in the streaming and gaming communities.
The process involves a camera operator shooting video in front of a large green (or sometimes blue) screen. The camera records only the color information of the subject, but not the green screen itself, allowing for it to later be replaced by any other desired image. Once completed, this new image creates the illusion that the subject is actually standing against an entirely different background than before.
One key element to making this effect work properly is achieving even levels of light across your green or blue screen surface. This can often require extensive lighting equipment or tools like diffusers. Additionally, many computers and phones now come with built-in software for chroma keying out of background colors like green and blue, so everyone who wants to create some amazing virtual backgrounds will eventually have all they need right at their fingertips!
Benefits of Green Screen
Green screen technology is incredibly useful for filmmakers and content creators, as it simplifies the process of adding effects and backgrounds to certain scenes. It is also a great tool for creating special effects in movies as well as for creating virtual sets for television and video production.
In this article, we will discuss the benefits of using green screen technology in filmmaking.
Getting started with your own stop motion storyboards
Subscribe to our newsletter and get your free download with three storyboards. Get started with bringing your stories alive!
We'll only use your email address for our newsletter and respect your privacy
Cost-effectiveness
Using a green screen is an incredibly cost-effective way of producing professional-looking videos without the expense of relocating to different locations or hiring expensive equipment. The technology requires minimal setup so you don’t have to incur the cost of renting gear or studio space. Additionally, when it comes to software, you don’t need high-end industry standard solutions – cheaper options often suffice.
It also allows you to avoid purchasing physical props like furniture and décor, which can become outdated quickly as trends change. Finally, green screen footage can be edited much faster than traditional video production since no additional special effects are required for most projects.
Time-saving
Green screen technology is well-known for the time it can save in the filming process. This type of technique offers a variety of unique ways to build impressive and high-quality content quickly and efficiently.
One big advantage of using green screens is that they make post-production editing much easier as long as you’re familiar with the technology. Green screen videos also require less lighting because the green creates a consistent backdrop throughout the scenes, making it easier to remember which colors need to be adjusted.
Finally, using green screens saves time when it comes to taking multiple shots and editing them together into one scene; with a simple camera and a single green background, many different videos can be composed without any additional equipment or complex setup required.
Creative possibilities
Green screen technology brings a wide range of creative possibilities to any video production. It gives the ability to post production talent to create background images or animations during the editing process. This makes it possible for the viewer to be virtually transported anywhere in the world, even if the shot has been filmed in a small studio.
Green screens are also used for compositing multiple shots together, allowing producers and editors more freedom with their shots and data sources. In addition, green screens allow the crews and actors to record their shots in different locations while achieving a seamless onscreen experience between different sets.
Lastly, green screens are often used in special effects shots where elements such as explosions or smoke can be added later on in post-production, creating a realistic outcome that might not have been possible otherwise. These same techniques can be applied for weather footage, allowing producers to match elements from two different scenes seamlessly together for a smooth transition when editing scenes together.
When to Use Green Screen
Green screen is a powerful filmmaking and video production technique that allows filmmakers to composite multiple images together in post-production. It can help you create realistic visual effects, backgrounds, and more. But when is the best time to use green screen?
This article will discuss the different situations where green screen can be used and how to get the best results:
Film and video production
Green screens are widely used in film and video production to isolate subjects in post-production. They provide filmmakers with an incredible way to layer in static or moving elements into a scene, creating a much more dynamic experience. A few examples of green-screen techniques include combining actors with the background of an alien planet or making it look like two different scenarios were shot at the same time.
In film and television production, green screen is commonly used to create effects that would normally require major on-site installations – such as international strolls through various locales, action scenes involving immense stunts, or even creating entirely new landscapes out of thin air. To achieve these effects, actors are recorded separately against a tank green backdrop while the camera remains stationary tracking location data from set markers around them. This allows for the background elements of each shot to be altered during post-production without disrupting the integrity of any live action shots captured on set.
As well as allowing for special effects sequences using computer generated imagery (CGI), this technique can also retain the lighting conditions used when shooting live footage and apply them when layering in separate elements that have been recorded separately from it. This can create incredibly realistic results if done correctly and allows for previously impossible scenes to be created with relative ease.
Photography
Green screen is an important tool for photographers looking to create unique, high quality images without the expense and time commitment of a location shoot. While green screens are most commonly used for film and television, they are also a useful tool for photographers. Green screen photography involves using a solid green or blue background, often painted directly onto a wall, which allows the photographer to replace the background with any image of their choosing in post-production.
The main advantage of using green screen is that one can change backgrounds quickly without having to physically move from one location to another. This saves money as well as time and effort when shooting photos that require multiple or changing backdrops. Photography in chroma key (green or blue) offers great editing flexibility with countless design options. It also significantly improves compositing options when shooting against white backgrounds or backgrounds with complex shadows.
Green screen photography is used extensively in fashion photography, product shots and portrait work, allowing photographers to create stunningly unique images without having to rely on props, models and additional equipment like light tents and reflectors. Green screens do require careful lighting setup for optimal results so expert knowledge of lighting techniques is required for best results.
Virtual reality
Green screen is a visual effect where part of the background image (in this case a green screen) is removed and replaced with another image. It has been used in films, commercials, and television since the 1950s.
Virtual reality can benefit from the use of green screens to create more immersive experiences. When used in conjunction with 3D camera tracking and compositing software, filmmakers are now able to create interactive environments that feel more realistic than ever before. With the use of green screen, filmmakers are able to add virtual elements such as sky boxes, CG props, environmental objects and much more into their scenes. Additionally, when it comes to live-action augmented reality projects for mobile or interactive applications such as video games, virtual reality offers a real-time experience dependent on interaction scenarios enabled by green screens that provide natural frames for digital objects to be created from.
When considering which type of “green screen” technology would be best suited for a VR project you should consider how easily manipulated it will be in post-production or during filming sessions. Factors such as:
- color shift calibration accuracy need to be taken into consideration when choosing an appropriate color solution so that any potential problems can be successfully avoided during post production workflows.
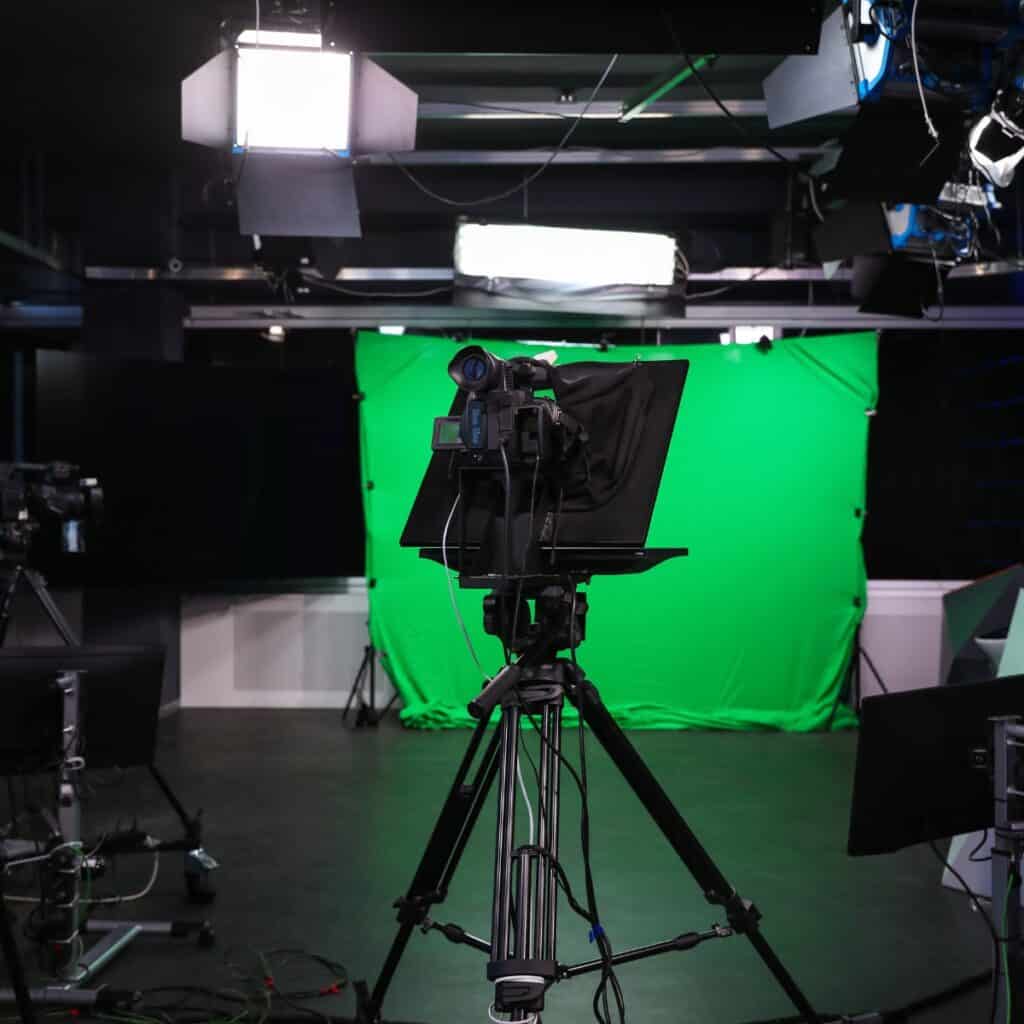
Equipment Needed
Green screen is an innovative video editing technique that uses chroma key technology to remove the background of a video and replace it with any other image or video. To achieve this effect, several pieces of equipment are needed.
The most important piece of equipment is a green or blue background, which is used to create the chroma key effect. Other necessary elements include:
- A digital video camera
- A chroma key software program
- A computer
Let’s look at each of them in detail.
Camera
When shooting a green screen scene, using the right kind of camera is extremely important. Knowing which type of camera to use in a given situation can be tricky. Generally speaking, choosing what type of camera to shoot on when working with green screens depends on your particular project’s needs.
If you are looking for a more cinematic look, then it boils down to two main choices: film or digital cameras. Digital cameras are generally considered the best option as they provide higher resolution footage and can produce images that have sharper clarity and color precision. Film cameras offer different characteristics such as grainy visuals or an organic “look” but require more work in post-production for optimal results with a green screen.
Depending on your budget, both professional-grade consumer digital cameras and semi-professional digital cameras will do perfectly well when it comes to making high quality images with a green screen. It is important to choose a camera that allows you to adjust its settings so that you can remain in control while shooting your video footage with the green screen background.
Additionally, it is equally important to pay attention to the lens of the camera you decide on – wide angle lenses may work better in certain scenarios instead of telephoto lenses depending on how large your green screen is and what kind of composition you plan on incorporating into your shot(s) when editing later down the line.
Computer
Using a green screen or chroma key backdrop requires a decent amount of equipment and settings.
At the very minimum, in order to create convincing chroma key effects in post production, you need a computer to run the software on. Depending on how complicated your chroma key effects will be, as well as the video editing/post production software you will be using, you may need a powerful computer (or laptop) with good graphics processing power.
The graphics card can play an important calculation role when it comes to drawing the lines and masking out the desired colors correctly in real time. Depending on how big your green screen shoot will be, you might even need multiple computers to view the footage simultaneously or render out complex edits in relatively short periods of time. There are also specific software programs dedicated for use with green screens that are available—though these would likely require more expensive machines than standard video editing programs like Adobe Premiere or Final Cut Pro X would (which ironically don’t give users any built-in tools for chroma keying).
Software
When shooting with a green screen, it’s important to use special software and plugins to properly composite your green screen footage. More powerful, non-linear editing software programs like Adobe After Effects or Avid Media Composer are recommended, especially for beginners, due to the complexity of the process. Depending on the needs of your project, you may be able to use lesser software such as Windows Movie Maker.
Green screen compositing can be done without plugins by keyframing masks and painting them on by hand, but there are powerful plugins that simplify this process and allow it to be done easily. Popular plugins that are used in green screening include Re:Vision VFX Primatte Keyer 6 and Red Giant’s Chromatic Displacement.
Software also can significantly reduce the amount of time required in post production when working with green screens. Be sure to do your research and get familiar with available options before you start shooting so you can ensure you have everything necessary for clean picture quality in your finished product!
Lighting
When working with green screen, proper lighting is essential and having the right equipment makes a significant difference in the quality of your results. Lighting setup is relatively straightforward, as long as you plan carefully.
The three basic types of lighting are key light, fill light and backlight. You’ll need to be aware of all three when setting up for a green screen shoot.
- Key Light: The key light is the strongest light used, it provides the majority of illumination for your shot. This can be either a flat panel LED light or traditional hot lights – when shooting on a green screen try to match your key light to tungsten color temperature (3200K).
- Fill Light: Fill lights help create nice even lighting in areas that may be shadowed by the key or back lights, they should be positioned opposite the key light and generally no more than 2 stops lower than the key-light so that shadows aren’t created. If using traditional hot lights try using at least 2x 1k instruments or higher depending on budget constraints.
- Backlight: The backlight adds depth and dimension to your image and should supplement (not overpower) your overall exposure/lighting setup – aim for 1 stop brighter than your Key-Light if placing directly behind talent. This can also be either flat panel LED’s or traditional hot lights – when shooting on a green screen try to match your back-lights again to tungsten color temperature (3200K).
Tips For Using Green Screen
Green screen technology is a useful tool in filmmaking, television production, and photography. It can be used to replace a background scene or create a composite image by combining two or more images together.
To make the most of the green screen technique, there are a few tips and tricks that need to be followed. In this article, we will look at those tips and discuss when and how to use green screens for best results.
Choose the right background
When it comes to using green screen, the most important aspect is the background you choose. It’s essential to select the right shade of green and have even lighting within a range of 5-10 f-stops. The more even your lighting is, the better your results will be when you move onto replacing the set background with a digital one. It’s best to use a high quality digital camera that’s easy to use and allows you to maintain control over both focus and exposure settings.
The chosen backdrop should also extend beyond what can be seen in the video frame. This ensures there are no unwanted elements included that can’t be seen before shooting starts. When looking for backdrops, make sure they don’t have shadows, wrinkles or other objects that would interfere with performance or create confusion when editing later on. A smooth matte finish will make it easier for you to adjust underexposed or overexposed areas in post-production and help ensure clean keys for an easier chroma keying process too!
Properly light the green screen
To get started with green screen, you must make sure you have the proper lighting. Lighting setup for a green screen is vital to ensure that your subject is evenly lit and appears in contrast to the background. It’s worth investing in a good quality key light and backlight or rim light if possible.
The key light should be placed slightly above your subject and at a 45-degree angle from the direction of the camera. The backlight or rim light should be set up behind the subject and directed toward their backside; this will help them stand out more against the green screen backdrop. Finally, fill lights are set up to reduce any harshness of shadows, but they are not essential.
It’s important to make sure that your lights don’t spill on your green screen itself, however, as a shaded area can create dark spots on your resulting video. Keep an eye on how bright both your subject and this background are when setting up lighting – any difference can create contrast issues when digitally removing the backdrop!
Use a high-quality camera
Using a high-quality camera will not only help create a better quality image with better depths of field, but it will also reduce the amount of post-production work you need to do. Post-production is necessary to refine any green screen footage, and having a high quality camera will help cut down on the time it takes to manually fine tune your footage.
Try to find cameras that have higher megapixels and come with software that can help enhance features like contrast or saturation. It’s also important to look for cameras that have wide dynamic range capabilities, as this will help make your shots appear more natural and less flat.
Lastly try having multiple lighting options available on set as this can change the feel of the image significantly—you may want different levels of light depending on what kind of image you’re going for.
When using green screens for VFX, a good rule of thumb is that you should always err on the side of caution and take extra precautions when setting up your shots in order to get the best possible performance from them.
Use a tripod for stability
Most green screen shots require a good degree of stability. Ideally you should use a tripod and make sure your shot is locked down with no movement. It’s important to keep the handheld shots steady if you’re using them as they will be much harder to clean up if they are shaky or moving around. You can also use a dolly or jib arm for dynamic movements, but make sure it’s smoothly operated and that the camera is locked off before you start filming.
Use separate microphones: Using two microphones – one for the talent and one for the room noise – helps keep ambient noises like air conditioning and traffic away from the main audio track that is being used for background purposes. Both microphones create both an ambient track as well as a dialogue track which will provide sound editors with some flexibility in post-production to create a seamless soundtrack.
Shoot at various distances: It’s important to take multiple shots from various distances when shooting green screens as this will give your editor more options when piecing together the final shot. Having close-ups and wide shots is essential for providing more realistic transitions between backgrounds in post-production, so make sure you have plenty of footage shot at different distances.
Keep lighting consistent: Lighting must be consistent throughout your shoot in order for digital matte artists (DMAs) to work efficiently when compositing digital backgrounds into your footage in post-production. It’s best practice to lock down all lighting sources while shooting and ensure that they are evenly distributed across the whole image area rather than just where your talent is positioned in frame. This way, DMAs can take measurements on any part of frame should they need to manipulate light levels during their compositing process.
Conclusion
The use of a green screen provides filmmakers and videographers with a world of options when creating content. Whether using live action footage or animated elements, the end goal is to capture an audience and create a narrative. By following good shooting practices and using the latest compositing techniques, a green screen production can provide viewers with an engaging experience full of life and wonder.
Using a green screen requires pre-production planning in order to effectively use its advantages. With the right tools, creative direction, and post-production techniques, filmmakers can combine their talents to create films and videos that truly stand out from the competition. By focusing on practical lighting principles, understanding shooting techniques, or relying on digital tools and matte painting tricks, gradually images are formed around ideas into scenes that captivate audiences around the world.
With all said above it is amazing what you can do if you harness the power of green screens!

Hi, I'm Kim, a mom and a stop-motion enthusiast with a background in media creation and web development. I've got a huge passion for drawing and animation, and now I'm diving headfirst into the stop-motion world. With my blog, I'm sharing my learnings with you guys.
