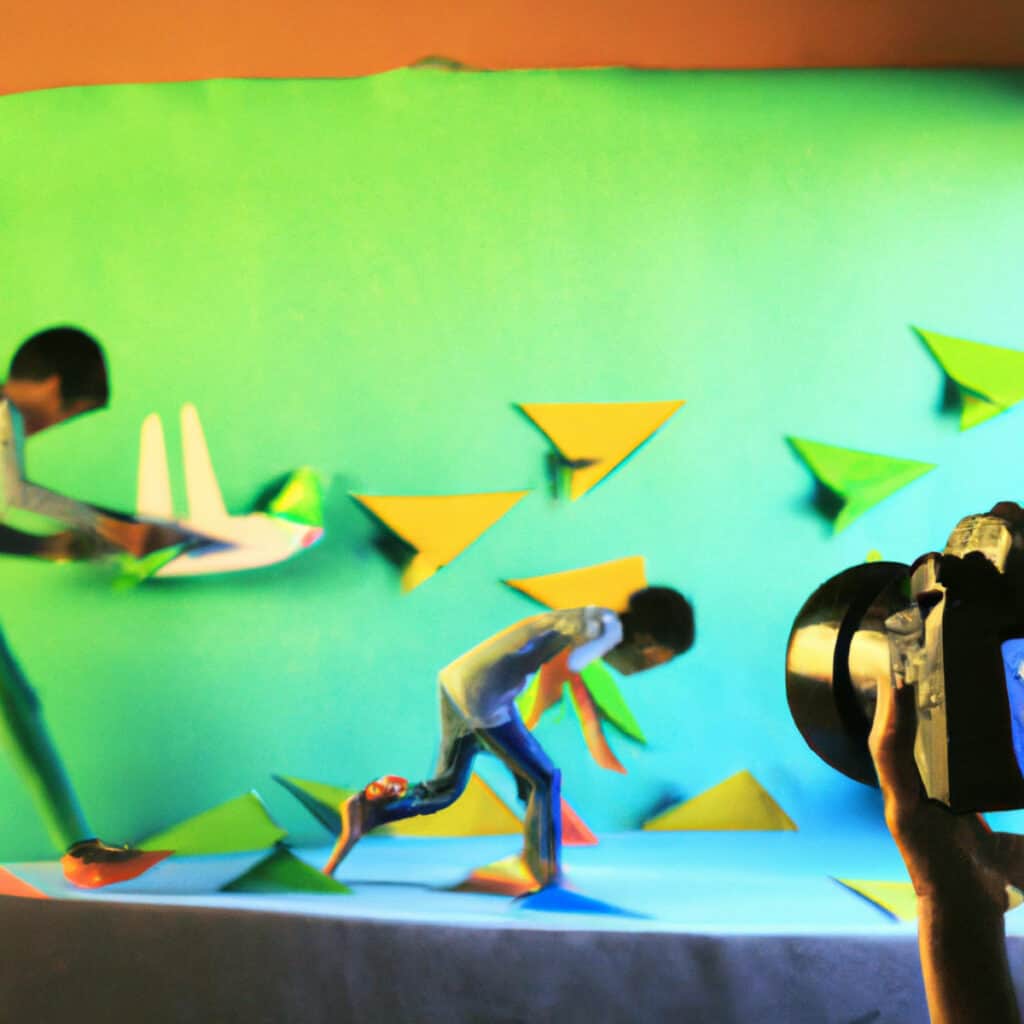
Best Stop Motion Camera Hacks for Stunning Animations

Stop motion animation is a pretty unique and incredible technique that allows artists to create a whole new world, one frame at a time.
It’s a popularized art form that has captured the hearts of young and old alike, with famous examples like Wallace & Gromit and Coraline.
But now that you’re making your own stop motion, you need to know some useful camera hacks to make your animation stand out.
Hacks are great, aren’t they? They help us get around problems and make things better.
So I thought I’d look into the best stop motion camera hacks.
I mean, if you’re going to be animating with a camera, you might as well make it as easy as possible, right?
So let’s look at some of the best stop motion camera hacks.
In this post we'll cover:
Best camera hacks for stop motion
Your camera is your goldmine when it comes to shooting stop motion (I explain what to look for in a camera for stop motion here).
If you know how to use it properly, you can come up with unique effects that many amateur animators don’t know about yet.
Here are a few camera hacks that you can use in stop motion animation to add interest and creativity to your shots.
Getting started with your own stop motion storyboards
Subscribe to our newsletter and get your free download with three storyboards. Get started with bringing your stories alive!
We'll only use your email address for our newsletter and respect your privacy
Create a bokeh effect
Bokeh is a photographic term that refers to the aesthetic quality of the blur produced in the out-of-focus parts of an image.
In other words, it’s the soft and blurry background that you often see in portrait photography.
To create a bokeh effect in your stop motion animation, you can place a piece of black paper with a small hole in it over your lens.
This will create a small, circular aperture that will blur the background and create a bokeh effect in your shot.
The size and shape of the aperture will affect the quality and shape of the bokeh.
For example, a larger aperture will produce a softer and more blurred background, while a smaller aperture will produce a sharper and more defined bokeh effect.
The shape of the aperture will also affect the shape of the bokeh; circular apertures will produce round bokeh, while apertures with other shapes (such as stars or hearts) will produce corresponding bokeh shapes.
Using a bokeh effect in your stop motion animation can add depth and visual interest to your shots.
By selectively blurring the background, you can draw the viewer’s attention to the subject of your shot and create a more dynamic and engaging image.
Overall, creating a bokeh effect in your stop motion animation is a simple and effective way to add a unique and creative visual element to your shots.
Use a prism
Using a prism in front of your camera lens is a simple yet effective camera hack that can add a unique and creative visual element to your stop motion animation.
A prism is a triangular-shaped glass or plastic object that can reflect and refract light in interesting ways.
By holding a prism in front of your camera lens, you can create reflections, distortions, and interesting patterns in your shots.
All you have to do is hold a prism in front of your lens to create interesting reflections and distortions in your shots.
You can experiment with different angles and positions to create a unique effect.
Here are some tips for using a prism in your stop motion animation:
- Experiment with angles: Hold the prism at different angles in front of your lens to create different effects. You can try rotating the prism or moving it closer or further away from the lens to create a variety of reflections and distortions.
- Use natural light: Prisms work best when there is a lot of natural light available. Try shooting near a window or outside to take advantage of the natural light and create interesting reflections.
- Use a macro lens: If you have a macro lens, you can get even closer to the prism and capture more detailed reflections and patterns.
- Try combining multiple prisms: You can experiment with combining multiple prisms to create even more complex and interesting effects. Try stacking prisms or positioning them at different angles to create layered reflections and distortions.
Using a prism in your stop motion animation is a fun and creative way to experiment with light and reflections.
It can add a unique and visually interesting element to your shots and help make your animation stand out.
Use a lens flare
Using a lens flare is a camera hack that involves creating a bright, hazy glow or flare effect in your stop motion animation.
Lens flares can add a dreamy, ethereal quality to your shots, and can create a sense of warmth and light.
To create a lens flare in your stop motion animation, you can hold a small mirror or reflective surface in front of your lens at an angle.
This will reflect light back into the lens, creating a flare effect in your shot.
Here are some tips for using a lens flare in your stop motion animation:
- Experiment with angles and positions: The angle and position of the reflective surface will affect the size and shape of the lens flare. Try holding the mirror at different angles and positions to see what works best for your shot.
- Use natural light: Lens flares work best when there is a lot of natural light available. Try shooting near a window or outside to take advantage of the natural light and create interesting flares.
- Use a lens hood: If you’re shooting in a bright environment, you may want to use a lens hood to help reduce unwanted reflections and glare.
- Adjust your exposure: Depending on the brightness of the flare, you may need to adjust your camera’s exposure settings to ensure that the rest of your shot is properly exposed.
Using a lens flare in your stop motion animation is a creative way to add visual interest and depth to your shots.
It can create a warm, dreamy atmosphere and help make your animation stand out.
Create a miniature effect
Creating a miniature effect is a camera hack that involves using certain camera angles and techniques to make the subject of your shot appear smaller and more toy-like.
The miniature effect is often used in stop motion animation to create the illusion of a small, toy-like world.
To create a miniature effect in your stop motion animation, you can position your camera at a high angle and shoot down at a scene from above.
This will make the scene appear smaller and more toy-like.
You can also use a shallow depth of field to selectively focus on certain parts of the scene and create a sense of scale.
Here are some tips for creating a miniature effect in your stop motion animation:
- Choose the right scene: The miniature effect works best when shooting scenes that feature objects or environments that are normally larger in scale. Try shooting scenes that include buildings, cars, or other objects that can be made to appear smaller and toy-like.
- Use a high angle: Position your camera at a high angle and shoot down at the scene from above. This will create the illusion of looking down at a miniature world.
- Use a shallow depth of field: Use a shallow depth of field to selectively focus on certain parts of the scene and create a sense of scale. This will help make the objects in the scene appear smaller and more toy-like.
- Consider using props: Adding props such as miniature people or toy cars can help enhance the miniature effect and create a more realistic and engaging scene.
Creating a miniature effect in your stop motion animation is a creative way to add visual interest and depth to your shots.
It can create a unique and engaging world and can help make your animation stand out.
Use a tilt-shift lens
Using a tilt-shift lens is a camera hack that can help you create unique and creative effects in your stop motion animation.
A tilt-shift lens is a special type of lens that allows you to selectively tilt or shift the lens element, creating a unique depth-of-field effect in your shot.
This effect can be used to create a miniature effect or to selectively focus on certain parts of the scene.
Here are some tips for using a tilt-shift lens in your stop motion animation:
- Experiment with tilt and shift: The tilt-shift effect works by selectively tilting or shifting the lens element, creating a unique depth-of-field effect in your shot. Experiment with different tilt and shift settings to see what works best for your shot.
- Use a tripod: A tripod is essential when using a tilt-shift lens, as even small movements can affect the tilt and shift settings. Make sure your camera is secure on the tripod, and use a remote shutter release to prevent any camera shake.
- Adjust your focus: With a tilt-shift lens, the focus point can be shifted to different parts of the scene. Use this to your advantage by selectively focusing on certain parts of the scene and creating a unique depth-of-field effect.
- Use a high aperture: To achieve a sharp focus across the scene, use a high aperture setting (such as f/16 or higher) to increase the depth of field.
Using a tilt-shift lens in your stop motion animation is a creative way to experiment with depth of field and selective focus.
It can create a unique and engaging visual effect in your shots, and can help make your animation stand out.
However, it’s important to note that tilt-shift lenses can be expensive and require some practice to use effectively, so it may not be suitable for all animators.
Use a plastic bag or shower cap to create a diffused light effect
Using a plastic bag or shower cap to create a diffused light effect is a simple and effective camera hack that can help you achieve a softer and more natural lighting effect in your stop motion animation.
To use this hack, simply place a plastic bag or shower cap over your camera lens, ensuring that it covers the entire lens.
The plastic material will diffuse the light and create a soft and even lighting effect in your shot.
This is especially useful when shooting in bright or harsh lighting conditions, as it can help reduce harsh shadows and create a more natural-looking image.
It’s important to note that the effectiveness of this hack will depend on the thickness and translucency of the plastic material you use.
Thicker materials will create a more diffused effect, while thinner materials may have less of an impact.
You may need to experiment with different materials to find the right level of diffusion for your shot.
So, using a plastic bag or shower cap to create a diffused light effect is a simple and cost-effective way to improve the lighting in your stop motion animation.
It can help you achieve a more natural and even lighting effect and can make your animation look more professional and polished.
Use a lens extension tube to create a macro effect
Using a lens extension tube is a camera hack that can help you achieve a macro effect in your stop motion animation.
A lens extension tube is an attachment that fits between your camera body and lens, allowing you to get closer to your subject and create a magnified image.
This can be useful for capturing small details and textures in your stop motion animation.
The lens extension tube works by increasing the distance between the lens and the camera sensor, which allows the lens to focus closer to the subject.
This results in a larger magnification and a macro effect.
To use a lens extension tube in your stop motion animation, simply attach the tube between your camera body and lens, and then focus on your subject as normal.
You can experiment with different tube lengths to achieve different levels of magnification, depending on the subject and scene you are shooting.
One thing to keep in mind when using a lens extension tube is that the increased distance between the lens and the camera sensor can reduce the amount of light that reaches the sensor.
This means that you may need to adjust your exposure settings or use additional lighting to compensate for this.
Overall, using a lens extension tube is a creative way to experiment with macro photography in your stop motion animation.
It can help you capture small details and textures that may not be visible to the naked eye and can add a unique and interesting visual element to your shots.
Use a zoom lens
Using a zoom lens is a camera hack that can help you add movement and depth to your stop motion animation.
A zoom lens allows you to adjust the focal length of your lens, which can create the illusion of movement or change in perspective in your animation.
To use a zoom lens in your stop motion animation, start by setting up your scene and framing your shot. Then, adjust your zoom lens to create the desired effect.
For example, you can zoom in slowly to create the illusion of an object getting closer or zoom out to create the opposite effect.
Using a zoom lens can help you add a dynamic element to your stop motion animation and create the illusion of movement or change in perspective.
It’s a great way to experiment with different camera techniques and enhance the visual interest of your animation.
Camera setting hacks for stop motion animation
The camera settings you choose for stop motion animation will depend on the specific look and style you’re going for and the lighting conditions you’re shooting in.
However, here are some general guidelines that can help:
- Manual mode: Use Manual mode to set your camera’s aperture, shutter speed, and ISO manually. This gives you complete control over your exposure settings and helps maintain consistency across your shots.
- Aperture: For stop motion animation, you’ll generally want to use a narrow aperture (higher f-stop number) to ensure a deep depth of field. This helps keep everything in focus from the foreground to the background. However, if you’re looking for a specific effect, you may want to use a wider aperture (lower f-stop number) for a shallower depth of field.
- Shutter speed: The shutter speed you choose will depend on the amount of light available and the desired amount of motion blur. A slower shutter speed will create more motion blur, while a faster shutter speed will freeze the action. In stop motion animation, you generally want to use a fast shutter speed to avoid motion blur and ensure sharp images.
- ISO: Keep your ISO as low as possible to reduce noise in your images. However, if you’re shooting in low light conditions, you may need to increase your ISO to get a proper exposure.
- White balance: Set your white balance manually or use a custom white balance setting to ensure that your colors are accurate and consistent throughout your shots.
- Focus: Use manual focus to ensure that your focus point stays consistent throughout your animation. You may also want to use focus peaking or magnification to help you get a precise focus.
Remember that these settings are just guidelines; you should experiment with different settings to achieve the look and feel you want for your animation.
Now, it’s time to get into more detailed tips and tricks that will help you create professional-looking animations.
Camera movement
I know that keeping your camera still is important, but for some scenes, the camera has to keep moving to capture the action.
So, we’re going to look at some useful camera moves that will elevate your stop motion videos.
Camera dolly
Using a camera dolly is a great way to add movement to your stop motion animation.
A camera dolly is a device that allows you to move your camera smoothly along a track or other surface.
By using a camera dolly, you can create dynamic and visually interesting shots that add depth and dimension to your animation.
A camera dolly made of LEGO can be a fun and creative way to add movement to your stop motion animation.
Using LEGO bricks to build a camera dolly allows you to customize the design to fit your specific needs and preferences.
It can be a cost-effective solution if you already have LEGO bricks on hand.
But there are several different types of camera dollies, including motorized dollies, manual dollies, and slider dollies.
Find a complete dolly track buying guide and review here.
Motorized dollies use a motor to move the camera along the track, while manual dollies require you to physically push the dolly along the track.
Slider dollies are similar to manual dollies but are designed to move in a straight line along a shorter track or rail.
When using a camera dolly for stop motion animation, it’s important to maintain consistency between your frames.
To do this, you may want to mark the position of the dolly between each frame, so you can reproduce the same camera movement for each shot.
Alternatively, you can use a motion control system that allows you to program the camera movement in advance and repeat it precisely for each shot.
Did you know there is an entire type of stop motion that uses LEGO figures called legomation?
Camera track
Another option is to use a camera track to keep the camera moving along.
A camera track is a tool that enables smooth video movement along a predetermined route.
Similar to a camera dolly in that it gives your stop-motion animation movement and depth, but instead of moving at random, the camera moves along a predetermined route.
Various materials, including PVC tubing, aluminum lines, and even a wooden board with wheels, can be used to create camera tracks.
The track’s stability and smoothness are crucial for enabling the camera to travel without jitters or bumps.
Long, fluid camera movements, which are challenging to accomplish with a camera dolly, can be created with the help of a camera track.
Additionally, it can be used to make repetitive motions or to move the camera in a predetermined pattern.
It’s crucial to plan out your shots in preparation and mark the camera’s position between each frame when using a camera track for stop motion animation.
By doing this, you can make sure that the camera moves smoothly and reliably throughout your animation.
Find 12 more handy tips to make your stop motion animation seem smooth and realistic here
Camera pan
A camera pan in stop motion animation is a technique that involves moving the camera horizontally while capturing a series of individual frames.
This creates the illusion of the camera panning across a scene in a smooth and fluid motion.
To achieve a camera pan in stop motion, you need to move the camera by a precise amount between each frame to create a seamless motion.
This can be done manually by physically moving the camera a small amount between each shot, or it can be done using a motorized pan/tilt head that moves the camera in a precise and controlled manner.
It’s easiest to use stop motion animation software like Dragonframe.
In the app or on your computer, you’ll use a small dot to mark where your movement begins. Then you drag to pan and draw a straight line to the dot’s new position.
Next, you’ll have to add several tick marks for each new frame.
Also, you have to adjust the handles and create the ease-in and ease-out, ensuring your ease-out is a bit longer than the ease-in.
Therefore, it takes a bit longer for the camera to stop.
Camera pans can be used to add movement and interest to your stop motion animation, and they’re particularly effective for showing off a large set or landscape.
They can also be used to create a sense of tension or drama by slowly revealing a key element in the scene.
When planning a camera pan, it’s important to consider the speed and direction of the pan, as well as the timing of any movements or actions in the scene.
You may also need to use additional lighting or adjust your camera settings to ensure that your shots are consistent and well-exposed throughout the pan.
Use a tripod
Keeping your camera steady is important for creating a smooth and consistent animation.
Use a tripod or some other stabilizing device to keep your camera in place (I’ve reviewed the best tripods for stop motion animation here)
Stop motion animation photography requires the use of a tripod because it keeps your camera steady and eliminates any unwanted motions or vibrations.
It’s crucial that the camera stays still when shooting stop motion animation because numerous still images are taken, combined, and then used to make a video.
Even the tiniest shake or movement can lead to inconsistent animation and an uneven finished output.
Switch to manual
Manual mode is often preferred over other modes for stop motion animation because it gives you full control over your camera’s settings.
In manual mode, you can manually adjust the aperture, shutter speed, and ISO, allowing you to fine-tune your exposure settings for each shot.
This is particularly important in stop motion animation, where consistency between each frame is crucial.
When shooting in automatic or semi-automatic modes, your camera’s exposure settings can vary between each shot, which can result in inconsistent lighting and exposure.
This can be especially problematic in stop motion animation, where even small variations in exposure can be noticeable and distracting.
Therefore, it’s best to set your camera to manual focus mode to ensure that the focus point stays consistent throughout your animation.
This is especially important if you’re shooting with a shallow depth of field.
When shooting stop motion animation, it’s essential to keep the focus point consistent throughout your animation to create a smooth and coherent visual flow.
Using manual focus allows you to have complete control over your focus and ensures that your subject remains in focus, even if there are slight variations in your setup or lighting.
When shooting with a shallow depth of field (i.e., a wide aperture setting), the depth of focus is very narrow, which makes it even more critical to use manual focus.
In such cases, autofocus may have difficulty finding the right focus point, resulting in blurry or out-of-focus images.
Additionally, manual focus allows you to focus on a specific part of your subject, rather than relying on your camera’s autofocus system to guess where to focus.
For example, if you’re animating a character’s face, you can focus on the eyes to create a more expressive and engaging animation.
Manual focus also gives you more control over the creative aspects of your animation, allowing you to intentionally blur or focus certain parts of your image for artistic effect.
Overall, using manual focus is essential for achieving consistency and creative control in your stop motion animation.
It may take some practice to master, but it will ultimately help you create a more polished and professional-looking final product.
Remote camera trigger
I’m sure you’ve heard of a remote camera trigger before.
With the aid of a remote camera trigger, you can remotely open your camera’s shutter without having to contact it.
This is helpful in a variety of circumstances, including stop-motion animation.
Using a remote trigger or cable release helps you avoid shaking the camera when you press the shutter button. This can help you create smoother animations.
Remote triggers can be connected or wireless, among other configurations. Usually very straightforward to use, a wired remote trigger attaches to your camera with a cable.
To take a picture, all you need to do is plug the cable into the remote port of your camera.
Most new remotes are wireless, so the triggers connect to your camera using a wireless transmission.
They usually come with a receiver that attaches to your camera and a small transmitter that you hold in your hand.
When you hit the transmitter’s button, a signal is sent to the receiver, activating your camera’s shutter.
In stop motion animation, using a remote trigger is advantageous because it gets rid of the requirement that you touch your camera to capture a picture.
Touching the buttons of the camera is likely to make your photos blurry.
This can lessen the likelihood of camera shake, which can produce shaky or unstable pictures.
It can also speed up your workflow by enabling you to quickly and effectively activate the camera without having to approach it every time you want to take a picture.
In general, stop motion animators who want to keep consistency and effectiveness while shooting can benefit from using a remote camera trigger.
Creative angles
Mastering the art of stop motion camera wizardry is not an easy feat, but the key is to use creative angles.
Don’t be afraid to experiment with unique camera angles and perspectives. This can add visual interest to your animations and help tell your story in a more engaging way.
Camera angles play an important role in stop motion animation, just as they do in live-action filmmaking.
By using unique camera angles, you can add depth and interest to your shots, and create a more engaging and dynamic animation.
Here are some tips for using unique camera angles in your stop motion animation:
- Experiment with different angles: Try out different camera angles to see what works best for your animation. Consider shooting from high or low angles, or try tilting the camera for a more dramatic effect.
- Use close-ups: Close-up shots can be very effective in stop motion animation, as they allow you to focus on specific details or emotions. Consider using close-ups to show a character’s facial expression or to highlight a key object in the scene.
- Use long shots: Long shots can be useful for establishing a sense of space and context in your animation. They can also be effective for showing off large sets or environments.
- Use dynamic camera movement: Consider using camera movement to add interest and depth to your shots. You can use a camera dolly or track to create smooth movements, or use a handheld camera for a more organic and natural feel.
- Consider the mood and tone of your animation: The camera angles you use should reflect the mood and tone of your animation. For example, low-angle shots can create a sense of power or dominance, while high-angle shots can create a sense of vulnerability or weakness.
Using unique camera angles can help make your stop motion animation more engaging and visually interesting.
By experimenting with different angles and camera movements, you can create a more dynamic and professional-looking final product.
GoPro tips and hacks
If you’re using a GoPro camera to shoot stop motion, there are some cool camera hacks to consider!
- Use a time-lapse mode: GoPro cameras have a time-lapse mode that allows you to capture a series of photos at set intervals. This mode can be useful for creating stop motion animation, as it allows you to capture a series of still images that can be compiled into a video later.
- Use a flip mirror: You can use a flip mirror attachment on your GoPro to create a unique and creative angle for your stop motion animation. The flip mirror allows you to shoot from a low angle while still being able to see the screen, making it easier to frame your shot.
- Use a fisheye lens: GoPro cameras have a built-in fisheye lens that can create a unique and distorted effect in your stop motion animation. You can also attach a fisheye lens accessory to your GoPro for an even more exaggerated effect.
- Use a remote trigger: A remote trigger can be useful for capturing photos without touching the camera, which can help reduce camera shake and ensure that your shots are consistent.
- Use a stabilizer: GoPro cameras are known for their shaky footage, but you can use a stabilizer attachment to keep your camera steady and achieve smoother shots.
- Use the GoPro app’s intervalometer feature: The GoPro app has an intervalometer feature that allows you to set up your camera to capture photos at set intervals. This feature can be useful for creating stop motion animation, as it allows you to control the timing and frequency of your shots with ease. The app also provides a live preview of your shots, which can help you ensure that your framing and focus are correct.
Conclusion
In conclusion, camera hacks can be a fun and creative way to experiment with different techniques and add visual interest to your stop motion animation.
From using a plastic bag to create a diffused light effect to creating a miniature effect with a high-angle shot, there are many different camera hacks that you can try to achieve unique and exciting effects in your animation.
While some camera hacks may require special equipment or skills, many can be done with materials you may already have on hand, such as a plastic bag or mirror.
By experimenting with different camera angles, lighting, and focus techniques, you can create a more dynamic and engaging animation that captures the imagination of your viewers.
Read next my top tips to make stop motion characters fly and jump in your animations

Hi, I'm Kim, a mom and a stop-motion enthusiast with a background in media creation and web development. I've got a huge passion for drawing and animation, and now I'm diving headfirst into the stop-motion world. With my blog, I'm sharing my learnings with you guys.
